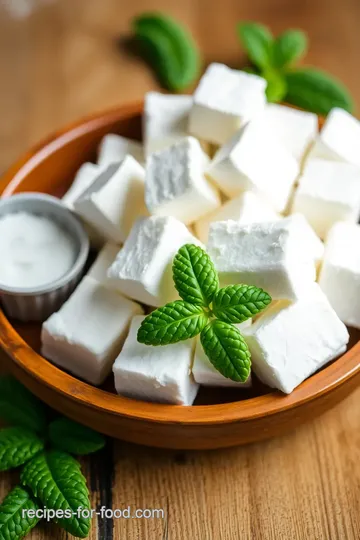
Whip Up Minty Marshmallows in 15 Minutes
Ever wanted to make your own Minty Marshmallows? Let's whip up minty marshmallows in 15 minutes! They're fluffy, delicious, and perfect for any occasion.

Whip Up Minty Marshmallows in 15 Minutes
Have you ever been in the middle of a cozy movie night and thought, man, some marshmallows would be perfect right now ? that’s exactly how i felt last winter.
The snow was falling, and i wanted something sweet to elevate my hot cocoa. the only problem? the store-bought marshmallows just weren’t cutting it.
That’s when i discovered how to whip up minty marshmallows in 15 minutes . seriously, it’s that easy! you’ll be amazed at how satisfying it is to make these fluffy delights from scratch.
A Sweet History
Marshmallows have been around for centuries, starting way back with the ancient egyptians who made treats from the root of the mallow plant (hence the name).
Today, they’re all about that fun sugar rush. with the rise of homemade sweets, diy candy projects like this one have exploded in popularity, making them a staple for everything from summer barbecues to holiday parties.
And don’t get me started on how a batch of mint-flavored treats can steal the show at any gathering!
Now, let's talk about how easy this recipe is. you’ll need a few basic ingredients and just 15 minutes of your time—great news for those of us who may not thrive in the kitchen.
Plus, you'll yield about 16 marshmallows. just think, sharing them with friends or using them as delightful gifts for the holidays instead of heading to the store.
Sweet Benefits Galore
Making your own homemade marshmallows isn’t just a fun kitchen project. these minty marshmallows can actually have some perks! for one, they’re a lot healthier than the store-bought kind, which can contain artificial flavors and excess preservatives.
These fluffy delights are free from funky ingredients, and making them yourself means you know exactly what’s going into them.
And let’s chat about serving these beauties. they’re perfect for holiday gatherings, movie nights, or as sweet toppings for your favorite dessert.
Maybe even dunk them in some hot chocolate or use them as a garnish on a festive cake. the possibilities are endless! plus, the mint flavor adds a lovely touch, making them ideal for christmastime—think candy canes but in marshmallow form.
Let's not forget the vibrant green food coloring option if you want to get festive! these little marshmallow squares can dazzle your dessert table and wow your guests.
Who wouldn’t want a unique twist on classic dessert flavors?
Making It Your Own
Now that you’re ready to start whipping up these scrumptious treats, you might be wondering about special techniques. here’s a quick tip: when whipping the egg whites, ensure that your bowl and beaters are grease-free for that perfect fluffy marshmallow texture .
A little attention goes a long way.
And if you feel adventurous, don’t shy away from marshmallow variations ! you could add coconut for a tropical vibe or throw in some cocoa powder for those chocolate lovers out there.
If you or anyone you know has dietary restrictions, you can even swap out the egg whites for aquafaba and still achieve that great texture.
Once you’ve made these delightful marshmallows, store them away securely. marshmallow storage tips suggest keeping them in an airtight container at room temperature to maintain that fluffiness.
They can last for about a week—if they last that long, that is.
Ready to dive into this minty marshmallow adventure? Let’s take a look at those ingredients!
Essential Ingredients Guide
When it comes to making Homemade Marshmallows , knowing your ingredients is key. Let’s dive into the essentials you need to whip up that Minty Marshmallows in 15 Minutes !
Premium Core Components
First off, you’ll need to get your basics down. Here’s what you need for that quick marshmallow recipe :
- Granulated Sugar: 1 cup (200g). Look for fine granules; it dissolves better.
- Water: 1/4 cup (60ml). Use filtered for the best taste.
- Light Corn Syrup: 1 tablespoon (15g). It keeps the marshmallows smooth. If you’re looking for corn syrup alternatives , you can use agave syrup.
- Peppermint Extract: 1 teaspoon (5g). Go for pure extract for that strong flavor!
- Egg Whites: 2 large. Fresh ones give you better volume.
- Cream of Tartar: 1/4 teaspoon (1g). It helps stabilize those egg whites.
- Powdered Sugar: About 1/2 cup (60g) for dusting. It prevents sticking like a charm.
Storage Tips: Store your marshmallows in an airtight container for up to two weeks at room temp. Keep ‘em cool, but not in the fridge.
Signature Seasoning Blend
Let’s spice things up!
- Essential Spice Combinations: Your marshmallows will shine with peppermint, but you could mix it up with vanilla for a slight twist.
- Herb Selections: Fresh mint can be chopped and mixed in for an extra minty bite.
- Flavor Enhancers: Don’t forget the opportunity to experiment! Add a pinch of sea salt to balance the sweetness.
Smart Substitutions
Got dietary restrictions? No worries, I’ve got your back!
- If you're avoiding eggs, aquafaba (the liquid from chickpeas) is a game-changer and perfect for that fluffy marshmallow texture.
- Need a quick fix? You can swap out the peppermint extract for almond extract if you’re feeling adventurous.
Kitchen Equipment Essentials
To pull this off, you don’t need a ton of fancy gadgets, but a few key pieces will make life easier:
- Heavy-Bottomed Saucepan: For heating sugar safely without burning.
- Candy Thermometer: If you got one, it’s a must for precision. It helps you hit that magical 240° F ( 115° C) for the perfect texture.
- Electric Mixer: This will get your egg whites whipped to perfection.
Oh, and if you don’t have a candy thermometer, don’t panic. You can still eyeball it; just look for that bubbly, syrupy consistency before boiling.
Easy Dessert Recipes & Variations
Once you get the hang of this recipe, the fun begins! Think about creating marshmallow variations : add cocoa powder for Chocolate Mint Marshmallows , or toasted coconut for a tropical vibe.
Festive Dessert Ideas
These fluffy treats aren't just tasty; they're a joy to make, especially during the holidays. they’d be a hit at any party, served alongside hot cocoa or even as a topping on a cute little dessert platter of fruit and ice cream.
Final Thoughts
Making mint-flavored treats like these Minty Marshmallows not only fills your belly but brings a sense of accomplishment too. Plus, they make great gifts; who wouldn’t love a jar of homemade delights tied with a little ribbon?
So, whether you’re looking for a great weekend project with the kids or just want to impress friends at a gathering, you've got everything you need to get started.
Now, let’s move on to the step-by-step instructions: you’re going to want to pay close attention to get that fluffy marshmallow texture just right. Happy cooking!
Mastering the Art of Homemade Marshmallows
Let’s get real for a second—everyone loves a good marshmallow, right? whether it’s for a cozy hot cocoa night or a fun s’mores party, those fluffy bites are always a hit.
And you know what’s better? whipping up minty marshmallows in 15 minutes right in your own kitchen. yep, you heard me! making your own marshmallows isn’t just a dream reserved for candy shops; it’s a super easy diy candy project you can handle with just a bit of prep.
Let's dive into how to do this!
Essential Preparation Steps
To kick things off, let’s talk about mise en place —a fancy french term that just means getting all your ingredients set up before you start cooking.
It’s a game-changer. measure out 1 cup of granulated sugar , 1/4 cup of water , 1 tablespoon of light corn syrup , and so on.
Trust me, it’ll keep your space tidy and prevent any "oh gosh, where’s the peppermint extract?" moments.
Next up is time management . since this is a quick marshmallow recipe, you want everything handy. the sugar syrup cooks fast, so have your egg whites ready to whip when the time comes.
Also, don’t forget to keep an eye on the temperature! you’re aiming for 240° f ( 115° c) —this is crucial for that perfect fluffy marshmallow texture .
Organization is key. lay out your equipment like your heavy-bottomed saucepan, mixing bowl, and electric mixer. the smoother your cooking process, the more fun you’ll have.
Lastly, safety first! handle the hot syrup with care. the last thing you want is a sticky situation—literally.
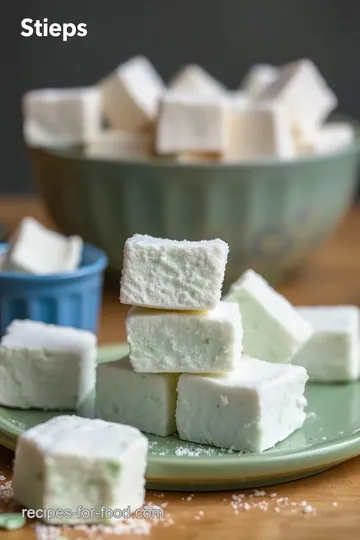
Step-by-Step Process
Now onto the fun part: the making! Here’s your step-by-step guide to these minty delights.
- Prepare the Pan : Line an 8x8-inch baking pan with parchment paper and grease it lightly.
- Make the Sugar Syrup : In your saucepan, combine sugar, water, and corn syrup. Stir it until it’s dissolved, then bring it to a boil. Remember, cook until it reaches 240° F ( 115° C) on a candy thermometer.
- Whip the Egg Whites : As your syrup cooks, grab those egg whites. Whip them with cream of tartar until you get stiff peaks. This takes a few minutes, but patience pays off! Add the peppermint extract towards the end—it’s total mint magic.
- Combine : Carefully pour your hot syrup into the egg whites while whipping on low speed. Keep mixing until it's thick and glossy. Visual cues? You’ll know you’re good when it looks like a fluffy cloud!
- Finish : If you’re feeling festive, add a drop of green food coloring. Spread that marshmallow goodness evenly in your prepared pan.
- Chill : Let it set for about 30 minutes—or, you know, longer if you can resist!
- Cut and Dust : Dust with powdered sugar, slice it up, and don’t forget to dust the sides to keep them from sticking.
Expert Techniques
Okay, now let’s get into some expert techniques to ensure your marshmallows are top-tier. make sure your mixing bowl and beaters are super clean—grease can mess up the egg whites.
And again, please use a candy thermometer ! it’s non-negotiable if you want that perfect texture.
Check for quality too. after you pour the syrup in, the mixture should glisten and hold shape. if it looks too runny, whip a little longer until you reach that glossy finish.
Need a troubleshooting tip? if your marshmallows don’t set properly, they probably needed more time to whip or more heat in the syrup.
Success Strategies
Remember, we all make mistakes—do not be hard on yourself! if you over-whip the egg whites, they might break down into clumps.
Not what you want! but hey, if you did make an oops, try experimenting with it as a dessert topping for ice cream or a fancy hot chocolate.
For the perfect results, ensure you’ve got your supplies close and ready, follow those temperature checks, and adjust your timing if needed.
And if you're in a rush, why not whip up a batch ahead of time? these marshmallows store nicely in an airtight container for up to two weeks, perfect for last-minute sweet cravings or gifts.
Phew! you’re now equipped to craft these delightful mint-flavored treats . but wait, i’ve got more where that came from. let's talk about some additional information , including variations and fun ways to customize your marshmallow experience.
Stay tuned!
Pro Tips & Secrets
Alright, let’s talk pro tips that make a difference! when i first started making homemade marshmallows, i thought it would be a messy ordeal.
But honestly, with just a few insights, you can nail that fluffy marshmallow texture like a pro.
-
Egg white whipping techniques: make sure your mixing bowl and beaters are super clean . any grease can prevent those egg whites from reaching stiff peaks.
I've learned this the hard way—nobody likes a sad marshmallow!
-
Candy thermometer tips: if you wanna get that sugar syrup just right, use a candy thermometer. once it hits 240° f ( 115° c) , it’s go time! too low, and your marshmallows won’t set.
Too high? you’re stuck with rock candy!
-
Flavor enhancement tips: want more oomph? add your peppermint extract towards the end of whipping the egg whites. this helps keep the intensity.
And if you're feeling adventurous, toss in a drop of green food coloring for fun and festive vibes!
-
Time-saving techniques: you know how things can slow down? multi-task while waiting for the sugar syrup to cook. get your egg whites whipped so that you’re ready to go once that syrup reaches its sweet spot.
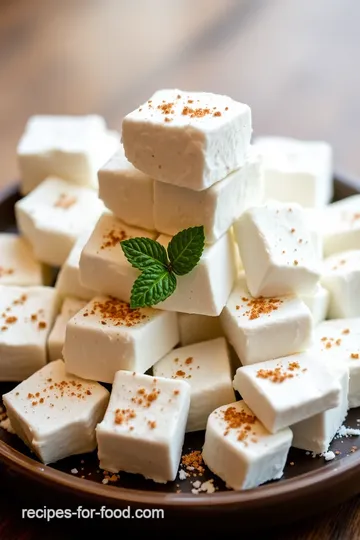
Perfect Presentation
Okay, you’ve made these beauties. Now you want to show ‘em off! Here are some plating techniques that'll wow your friends and fam.
-
Garnish Ideas: A sprinkle of extra powdered sugar or some crushed peppermint candies on top can make your marshmallows pop. It’s all about that visual appeal !
-
Color Combinations: Try pairing these minty marshmallows with a rich chocolate sauce drizzled over them. The contrast is not only tasty but also looks stunning on a dessert table.
-
Visual Appeal Tips: Serve them on a colorful plate—maybe even on a tiered dessert stand for extra elegance. Fancy, right?
Storage & Make-Ahead
Made an extra batch? No worries! Here’s how to keep those fluffy friends fresh.
-
Storage Guidelines: Keep your marshmallows in an airtight container. They can last up to two weeks ! Just make sure you dust those little puffs with powdered sugar to prevent sticking.
-
Reheating Instructions: Actually, you don’t really need to reheat marshmallows. Just let them sit at room temperature if they get a little hard. They’ll soften up in no time!
-
Freshness Duration: The longer they sit, the grainier they might get. I recommend devouring them within that two-week window for the best experience!
Creative Variations
Feeling creative? Let’s shake things up with some marshmallow variations .
-
Flavor Adaptations: Swap out the peppermint for other extracts. Vanillas or almond flavors can lead to totally different yummy outcomes!
-
Seasonal Twists: Around the holidays, consider making chocolate mint marshmallows . They’re perfect for hot cocoa or served as festive treats at gatherings.
-
Dietary Modifications: If you’re looking for gluten-free treat recipes, you’re already on the right track! Also, try using aquafaba for a vegan version.
Complete Nutrition Guide
Nutritionally speaking, these treats aren't just sugary indulgences. Here’s your quick breakdown:
- Calories: Around 75 per marshmallow—totally manageable!
- Health Benefits: Marshmallows can be nostalgic treats, perfect for celebration moments or cozy nights. Plus, homemade sweets reduce suspicious ingredients!
Just remember: moderation is key when it comes to sweets.
So, go ahead! gather your pals, and whip up minty marshmallows in just 15 minutes . trust me; they’ll be a hit, whether you’re crafting for a party or just treating yourself after a long day.
Baking with peppermint is a holiday classic, and with these homemade treats, you’ll have something special to share. enjoy the sweet moments, and happy cooking!
Frequently Asked Questions
How do I Whip Up Minty Marshmallows in 15 Minutes without fail?
To successfully whip up minty marshmallows in just 15 minutes, it's crucial to have all your ingredients and equipment prepared beforehand.
Ensure your mixing bowl and beaters are completely grease-free to achieve stiff peaks with the egg whites. following the sugar syrup temperature closely and mixing it rapidly into the whipped egg whites will yield a fluffy texture.
Can I make these Minty Marshmallows without a candy thermometer?
While a candy thermometer is recommended for ensuring your sugar syrup reaches the right temperature, you can still make minty marshmallows without one.
You can use a cold water test: drop a small amount of syrup into cold water; if it forms a soft ball, it's ready.
Just be aware that the texture might vary slightly without precise temperature control.
What are some fun variations for Minty Marshmallows?
You can get creative with your minty marshmallows by trying different flavors and add-ins. for a chocolate twist, mix in some cocoa powder for chocolate mint marshmallows.
You could also incorporate toasted coconut flakes for a tropical touch or even add matcha powder for a unique flavor and vibrant color.
How do I store my homemade Minty Marshmallows, and how long do they last?
To store your homemade minty marshmallows, keep them in an airtight container at room temperature. they should stay fresh for up to two weeks.
Be sure to dust them lightly with powdered sugar to prevent sticking; alternatively, you can mix cornstarch with sugar for added anti-stick properties.
Are there any healthy substitutes I can use for the ingredients?
Absolutely! if you want to reduce sugar intake, you can substitute powdered sugar with a sugar-free powdered sweetener. for those avoiding egg whites, aquafaba (the brine from canned chickpeas) can be a great substitute for achieving a similar texture.
If you don’t have light corn syrup, agave syrup works well as an alternative.
How can I use my Minty Marshmallows once they are made?
Once your minty marshmallows are ready, there are plenty of ways to enjoy them! they’re perfect for topping off hot cocoa or coffee.
Pair them with fresh fruits like strawberries or bananas for a delightful dessert platter, or indulge yourself by serving them alongside a scoop of vanilla ice cream.
They also make great gifts when packaged prettily!
Whip Up Minty Marshmallows in 15 Minutes Card

⚖️ Ingredients:
- 1 cup (200g) granulated sugar
- 1/4 cup (60ml) water
- 1 tablespoon (15g) light corn syrup
- 1 teaspoon (5g) pure peppermint extract
- 2 large egg whites
- 1/4 teaspoon (1g) cream of tartar
- Powdered sugar (for dusting, approximately 1/2 cup or 60g)
- Optional: Green food coloring (for a festive touch)
🥄 Instructions:
- Step 1: Line the baking pan with parchment paper and lightly grease with non-stick spray.
- Step 2: In a saucepan, combine sugar, water, and corn syrup. Heat over medium until sugar dissolves, then bring to a boil.
- Step 3: Cook until the mixture reaches 240°F (115°C) on a candy thermometer.
- Step 4: In a mixing bowl, whip egg whites and cream of tartar until stiff peaks form. Add peppermint extract towards the end.
- Step 5: Slowly pour the sugar syrup into the whipped egg whites while mixing on low speed until fully incorporated.
- Step 6: If desired, add green food coloring and spread the mixture into the prepared pan evenly.
- Step 7: Let marshmallows sit for at least 30 minutes or until set.
- Step 8: Dust the top with powdered sugar, cut into squares, and dust sides to prevent sticking.
Previous Recipe: Delicious Blend Garlic Mayo + Ranch Dressing | Quick 10-Minute Recipe
Next Recipe: How to Bake Paleo Peppermint Oreos - A Delicious Holiday Treat!