Hibiscus Tea Delight: A Refreshing Herbal Brew
Wondering how to make hibiscus tea? With its vibrant color and tangy flavor, this refreshing herbal infusion has quickly become my favorite summer beverage! Let's brew!

- Brew Up Some Brightness: Hibiscus Tea Delight
- A Little History on the Hibiscus
- Benefits Yeah, Free Your Mind
- Costs and Yield: Keeping it Real
- So, What Are You Waiting For?
- Your Go-To Essential Ingredients Guide
- Get Ready to Mix It Up in the Kitchen!
- Unlocking the Secrets to Hibiscus Tea: Refreshing & Delicious!
- Recipe Card
Brew Up Some Brightness: Hibiscus Tea Delight
Oh, my goodness! let me tell you about the first time i made hibiscus tea . it was on one of those scorching summer days—you know, the ones where you step outside and it feels like walking into a sauna.
I wanted something refreshing, something to cool me down without weighing me down. that’s when i stumbled upon the recipe for hibiscus tea: refreshing & delicious .
It’s been my go-to ever since!
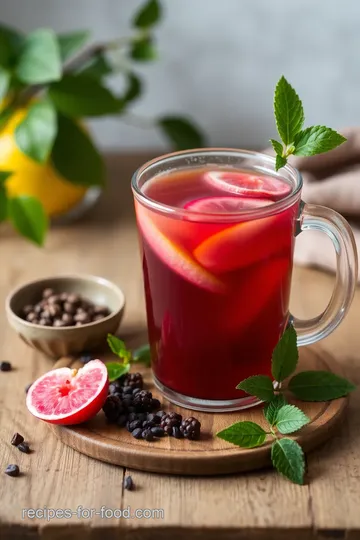
Honestly, if you’ve never tried this herbal infusion before, you’re in for a treat. when you steep those dried hibiscus flowers , they transform into a magical deep red elixir that’s just as fun to look at as it is to drink.
So, how can you resist, right?
A Little History on the Hibiscus
Let’s dive into where this delightful drink comes from. hibiscus tea has roots in ancient egypt, where it was used for its health benefits, not just for flavor.
Fast forward to today, and it's popular everywhere! you'll find it served in fancy restaurants, backyard bbqs, and even as a refreshing summer beverage at family picnics.
It’s like the underdog of drinks that has finally hit the spotlight!
Now, don’t sweat the details—this recipe is incredibly easy. we’re talking about 15 minutes max to whip up a batch, and it yields about 4 cups .
Perfect for those hot days when you need something to sip on. plus, you can easily adjust the sweetness to your liking, whether you’re into that tart vibe or prefer a sweeter twist!
Benefits Yeah, Free Your Mind
This isn’t just any pretty drink; it packs a punch health-wise. picture this: antioxidant-rich drinks that are caffeine-free and loaded with vitamins.
Hibiscus tea not only refreshes but also supports your overall well-being. it's a lovely way to hydrate that feels indulgent without being overly heavy.
Thinking of hosting a summer soirée? This would be the perfect companion on your table. Plus, you can jazz it up with some garnishing —think lemon slices or fresh mint leaves that scream “Instagram me!”
And let’s be real, who doesn’t love that vibrant color? Just pouring it into your favorite glass adds a burst of joy. Who knew making tea could feel like an art project?
Costs and Yield: Keeping it Real
Okay, so let's talk dollars and cents. hibiscus flowers are generally pretty affordable—sometimes you can even find them at your local grocery store.
The whole setup won’t cost you more than a couple of bucks, and the joy it brings? priceless! not to mention, this recipe fills up about a liter of delicious tea, so it’s great for sharing (if you feel like it)!
Also, it's super forgiving. say you want to make a big batch; just double the recipe! or go half if you’re just testing the waters.
The flexibility makes it a breeze to enjoy or share.
Feeling fancy? You can even explore different variations like citrus-infused beverages or a mix with spiced herbal tea. Trust me, once you learn how to make hibiscus tea , you’ll find yourself experimenting like a pro!
So, What Are You Waiting For?
Are you ready to dive into this delightful recipe? let’s get started on the ingredients you'll need to create this notable drink.
I promise you, it's going to be the highlight of your summer! go ahead and gather your kitchen essentials. the adventure into flavor awaits, and it all begins with hibiscus flower steeping !
Your Go-To Essential Ingredients Guide
So, you wanna get into cooking? let's make sure your kitchen is stocked up with the essentials. this is your essential ingredients guide , and trust me, it’ll make your cooking life way easier.
We’ll break it down into easy bits.
Premium Core Components
First off, let’s chat about those premium core ingredients that every kitchen should have. I’m talking about those that stand out and can transform your dishes.
- Detailed Measurements: If you’re in the U.S., you’re gonna want to stick with cups and tablespoons. But if you’re feeling a little international, you can use metric—grams and liters. Either way, keep a measuring cup handy.
- Quality Indicators: A great olive oil should smell fruity. Fresh spices should give off a strong aroma. If it’s dull, toss it out.
- Storage Guidelines: Flour can sit in your pantry for months, but keep it in an airtight container. The same goes for spices—air is their enemy!
- Freshness Tips: Always go for fresh herbs. You can tell they’re fresh when they smell strong. And when selecting produce, give it a squeeze; if it’s mushy, put it back!
Spice It Up with Signature Seasoning Blends
Now let’s make your food sing! You need to whip up a signature seasoning blend , and it’s easier than you think.
- Essential Spice Combinations: Think garlic powder, paprika, and onion powder—perfect for any savory dish.
- Herb Selections: Basil and oregano are staples. But why not mix it up with some rosemary or thyme?
- Flavor Enhancers: A splash of balsamic vinegar or a sprinkle of sea salt can elevate your meals.
- Regional Variations: Get inspired by global cuisines! Use curry powder for an Indian vibe or cumin for that Mexican flair.
Smart Substitutions Are a Game Changer
Ever find yourself halfway through a recipe and realize you’re missing an ingredient? No worries— smart substitutions are here to rescue you!
- Common Alternatives: No buttermilk? Just mix regular milk with a splash of vinegar.
- Dietary Modifications: Going vegan? Use aquafaba (chickpea water) instead of eggs for baking.
- Emergency Replacements: Out of cornstarch? Use flour—it’ll do in a pinch.
- Seasonal Options: Fresh berries in summer? Use frozen ones in winter. Keep it fresh and adaptable!
Kitchen Equipment Essentials
Alright, let’s get to the fun part—kitchen tools! You don’t need fancy gadgets, just some must-have tools .
- Must-Have Tools: A good knife, a cutting board, and some pots and pans will do wonders. Don’t forget a decent set of measuring spoons!
- Alternative Equipment Options: If you don’t have a food processor, a blender works just fine. Trust me, I’ve made plenty of smoothies without one.
- Preparation Tips: Prepping your ingredients before cooking makes everything smoother. Chop those veggies ahead of time.
- Storage Solutions: Invest in some glass containers—they’re great for leftovers and reduce plastic waste!
Now that you're all equipped with the essentials, let’s talk about something delicious: how to Make Hibiscus Tea: Refreshing & Delicious .
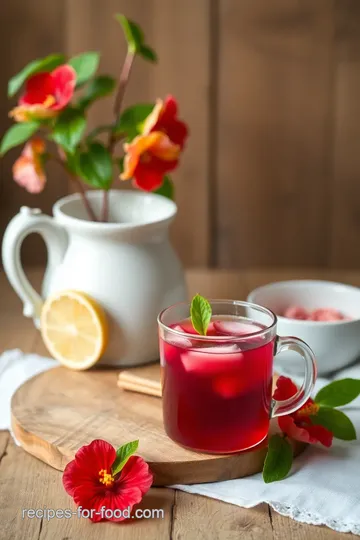
I just adore hibiscus tea—it's bright red, and packed with antioxidants. you can whip it up both hot and cold! imagine lounging on your porch, sipping a refreshing summer beverage that’s not just tasty but also caffeine-free.
Seriously, it’s a lifesaver during hot afternoons.
The beauty of preparing hibiscus tea is its simplicity. all you need are some dried hibiscus flowers and hot water.
Quick tip: if you wanna infuse some extra flavors, add some citrus or even a bit of ginger while it’s steeping.
I promise it'll turn out fabulous!
So, gather those essentials and keep on reading. i can’t wait to show you exactly how to craft this herbal infusion and explore its variations.
Believe me, once you get into it, you'll be whipping up easy tea recipes that impress everyone! ready to dive in? let's brew some hibiscus tea!
Get Ready to Mix It Up in the Kitchen!
If you're looking to step up your cooking game, you’ve come to the right place! today, i wanna chat about some professional cooking methods that can seriously elevate your culinary skills.
From organization to timing precision, i promise you'll feel like a kitchen rockstar in no time. so, roll up those sleeves; let's dive in!
Essential Preparation Steps
First off, let's talk about mise en place —that fancy french term meaning "everything in its place." it's all about gathering and prepping your ingredients before you start cooking.
Seriously, nothing's worse than being mid-recipe and realizing you're out of something. so, slice those onions, measure your spices, and have everything ready to go.
Next up: time management . try to plan out your steps. got a dish that needs to simmer for an hour? start on that while you chop veggies for something else.
Multitasking is your best friend, but remember: don’t burn your food!
Also, don't overlook organization strategies . use labels, containers—whatever you’ve got handy to keep everything tidy. a clean workspace helps keep a clear mind.
And hey, let’s not forget about safety! make sure your knives are sharp (but not too sharp, wink wink), and keep a fire extinguisher handy.
Safety first, friends!
Step-by-Step Process
Now let’s break down the actual cooking process. Here’s a little guide for you to follow:
-
Boil Water
Bring water to a rolling boil for items like pasta. You want it between 200° F to 212° F for the best results. -
Prep Ingredients
Add your prepared ingredients in the order of cooking time. Softer veggies go in last to avoid mush! -
Tempering Spices
Gently heat your spices in oil to unlock their full potential. Aim for about 30 seconds on medium heat. -
Monitor Cooking Times
Each component has a perfect cooking time. Don’t let things overcook! Use a timer if you must. That’s right, make the timer your new best friend. -
Visual cues for doneness
look for telltale signs that your dish is ready. for pasta, it should be al dente (a bit firm when you bite it), and meat should reach an internal temperature of 165° f .
Expert Techniques
Want to sound like a pro? Here are some expert techniques to whip out in your kitchen:
-
Sear Your Proteins
Make sure your pan is hot before adding meat. You want that sizzling sound. Searing helps develop flavors while keeping it juicy—win-win! -
Quality Checkpoints
Always taste as you go. You'll know if it’s missing that zing or needs a pinch of salt. -
Troubleshooting Tips
If your dish tastes flat, squeeze in some lemon or toss in a pinch of salt to brighten it up.
Success Strategies
Now, let’s avoid those cooking pitfalls that can ruin a dish. Here are some common mistakes to steer clear of:
-
Overcrowding the Pan
If you jam too much food in, it will steam instead of brown. Keep it loose! -
Skipping Taste Tests
Don’t be shy to taste along the way. You gotta know what you’re working with! -
Ignoring leftovers
cook in bulk and refrigerate for quick dinners later. consider making a big batch of hibiscus tea (oh yes, i’m talking about that herbal infusion that’s both refreshing and delicious!).
Speaking of hibiscus tea, you can make hibiscus tea: refreshing & delicious in a snap. trust me, it's a perfect companion to any meal or a delightful quencher on a hot day.
With this tea, you get all the benefits: rich in antioxidants and caffeine-free!
As you venture into the world of cooking, just remember that practice makes perfect. don't be afraid to experiment and have fun in the kitchen.
Happy cooking, and stay tuned for more on how to spice things up with hibiscus tea variations and other fun beverages next!
Unlocking the Secrets to Hibiscus Tea: Refreshing & Delicious!
If you’ve ever sipped on hibiscus tea and thought, “wow, this is so refreshing!” you’re not alone. this vibrant tea is more than just a pretty drink; it’s a healthy herbal infusion that bursts with flavor, making it the perfect addition to your summer refreshment lineup.
Let’s dig into some pro tips and secrets that’ll help you craft the best cup possible!
Pro Tips & Secrets
Honestly, getting hibiscus tea just right is all about balancing the tartness and sweetness. Here’s what I’ve learned from my own kitchen adventures:
-
Timing is everything : when you boil water and steep those dried hibiscus flowers , keep a close eye on the clock.
Steeping for around 10 minutes is golden. too long and it might turn bitter; too short and you’ll miss out on that bold flavor.
-
Sweet like you mean it : everyone has their own idea of the perfect sweetness. i usually start with about ¼ cup of sugar .
From there, adjust according to your taste buds! for a delightful twist, add a splash of vanilla extract —trust me, you’ll thank me later.
-
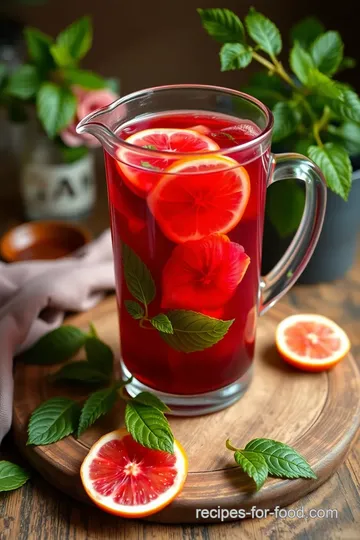
Show off the color : like any good beverage, how you present it matters! use clear glasses; the rich red hue of the tea is a showstopper.
Toss in a slice of lemon or a sprig of mint for an extra pop!
Perfect Presentation
Speaking of presentation, it’s not just about the color combinations ; you want it to look appealing too. Here's how to make your tea Instagram-ready:
-
Plating Techniques : Think about how you pour it. A nice high pour into a chilled glass can create a delightful splash. You want folks to notice that gorgeous color right away!
-
Garnish Wisely : A simple lemon wheel or a few fresh mint leaves can elevate your tea. Get creative; you could even add sprigs of rosemary for a unique twist.
-
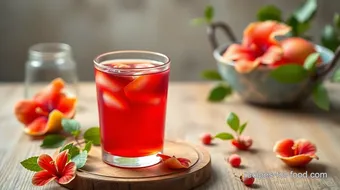
Visual appeal tips : if you’re feeling extra fancy, why not try multiple layers? pour the hibiscus tea over ice and add a splash of lemonade on top.
The result? a stunning gradient that’ll make your friends swoon.
Storage & Make-Ahead
Now, if you're preparing for a get-together, or just want to sip on your delicious hibiscus tea for a few days, I’ve got the scoop on storage too:
-
Keep any leftovers in a tightly sealed container in the fridge. It’ll last about a week. Just remember, the flavor might intensify because the tea is packed with antioxidants !
-
Reheat it when you crave a hot cup. Just warm it on the stove over low heat. It's so good on chilly evenings!
Creative Variations
Why stick to one flavor when you can have a whole array? Here are a few ideas to jazz up your hibiscus game:
-
Fruity Twist : Mix in some fresh fruit like strawberries or pineapple for floral tea flavors that brighten your day.
-
Seasonal Spin : Remember those citrus-infused beverages ? Adding a bit of orange or lime zest during steeping gives a nice summer zing!
-
Regional Flavors : In some places, hibiscus tea is served with spices like cinnamon or ginger . Try it out—especially on a cold day when you want something cozy.
Complete Nutrition Guide
Wondering what’s in that beautiful cup? Here’s a quick breakdown of what makes Hibiscus Tea such a gift to your health:
- Calories : It’s low-cal, ringing in at just 50 calories per serving. Yes, please!
- Sugar : While it does have sugar, consider swapping to natural sweeteners like honey or stevia to make it even healthier.
- Antioxidants : This tea is rich in antioxidants, which can help with overall wellness. You’re not just quenching that thirst; you’re doing something good for your body!
Expert FAQs
Got questions? Don’t worry; I’ve got your back! Here’s a little troubleshooting guide:
-
Why is my tea too tart? Add a bit more sugar until you hit that sweet spot, or try using honey for a softer sweetness.
-
Can I cold brew it? Absolutely! Just toss those dried hibiscus flowers in cold water and let it steep overnight. It’s an easy way to enjoy this refreshing summer beverage.
Let’s keep loving tea, and remember, making hibiscus tea is not just a task—it’s a fun mini-experience every time! so, gather your gear and give it a whirl.
You won’t regret it. happy brewing!
Hibiscus Tea Delight: A Refreshing Herbal Brew Card
⚖️ Ingredients:
- 1 cup (60g) dried hibiscus flowers
- 4 cups (960ml) water
- 1/4 cup (50g) sugar (or to taste)
- 1 tsp (5ml) vanilla extract (optional)
- Lemon slices or mint leaves for garnish (optional)
🥄 Instructions:
- Step 1: Place 4 cups of water in a medium saucepan and bring to a boil over high heat.
- Step 2: Once boiling, remove from heat and add 1 cup of dried hibiscus flowers.
- Step 3: Cover and let the mixture steep for 10 minutes, allowing the flavors and color to develop.
- Step 4: Using a fine mesh strainer or cheesecloth, strain the tea into a heat-resistant pitcher, discarding the flowers.
- Step 5: Stir in 1/4 cup of sugar (adjust to taste) until fully dissolved. If desired, add vanilla extract for an extra flavor boost.
- Step 6: Let it cool to room temperature, then refrigerate until chilled. Serve over ice or enjoy hot, garnished with lemon slices or mint leaves.
Previous Recipe: Easy Nutella Swirl Banana Ice Cream: 15-Minute Heavenly Treat!
Next Recipe: Delicious Blueberry Burst Healthy Smoothie: 3 Secrets for an Amazing Treat!