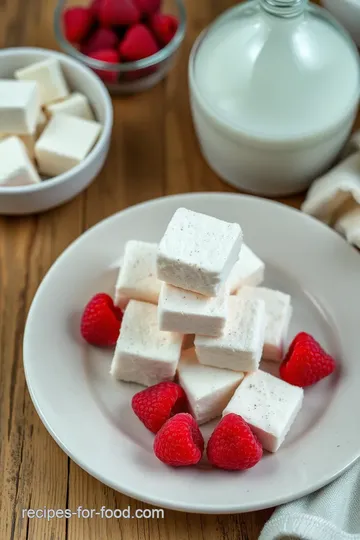
Raspberry Bliss: Make Paleo Marshmallows
Want to impress your friends? Make Paleo marshmallows with raspberry flavor! They're fluffy, delightful, and perfect for any sweet moment. Give it a try!

- Sweet Treats with a Twist: Make Paleo Marshmallows with Raspberry Flavor
- Essential Ingredients Guide
- Discover the Art of Professional Cooking
- Pro Tips & Secrets for Making Paleo Marshmallows
- Perfect Presentation
- Storage & Make-Ahead
- Creative Variations
- Complete Nutrition Guide
- Wrapping It Up
- Frequently Asked Questions
- Recipe Card
Sweet Treats with a Twist: Make Paleo Marshmallows with Raspberry Flavor
Ever had one of those “oh my gosh!” moments in the kitchen? you know, the kind where you whip up something that’s way beyond what you expected? that happened to me when i decided to make paleo marshmallows with raspberry flavor .
I was just trying to find a fun, healthier treat for summer, and let me tell you, i hit the jackpot! my kids were wild about them, which isn’t always the case when i try something new.
This recipe has since become our family favorite, especially for bbq nights and picnic adventures.
A Peek Into History and Today’s Buzz
So, where did marshmallows come from anyway? believe it or not, their roots go back to ancient egypt, where folks whipped up a sweet treat from the sap of the mallow plant (not exactly what you find in the store today!).
Fast forward to the present day, and homemade marshmallows are making a comeback. they’re a staple in the paleo desserts world, and for good reason! not only can you control the sweetness by using natural sweeteners like honey or maple syrup, but you can also jazz them up with fun flavors like tart raspberries.
Time and Cost Considerations
Now, i won’t lie to you; making these fluffy wonders is a bit of a process. expect about 55 minutes of total active time (plus some waiting while they set), but i promise it’s worth every second.
You might find the ingredients a tad on the pricey side, especially if you’re new to paleo-approved ingredients . but hey, this recipe yields around 16 marshmallows , which is quite the haul for your time and money!
Why You’ll Love These Marshmallows
Let’s talk benefits! first off, these gluten-free marshmallows are a hit with the health-conscious crowd. they’re made from wholesome ingredients and are a light, fluffy treat that won’t make you feel guilty.
If you’re on a low-sugar kick, you can even tweak the recipe to cut down the sweetness without sacrificing that delightful fluffy texture.
But there's more! these little puffs of happiness are so versatile. you can serve them as a refreshing dessert option at a summer gathering or sprinkle them over a fruit salad to add an unexpected chewy twist.
Plus, they make excellent gifts when packaged up cute!
Seasonal Delights and Creative Variations
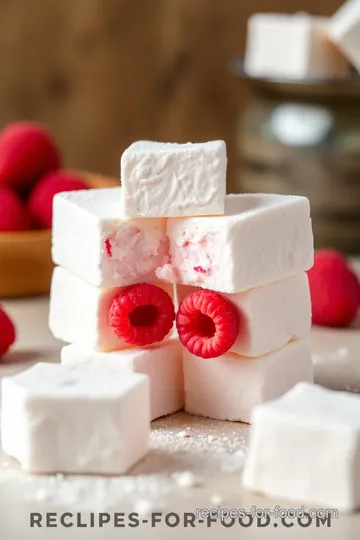
Picture this: piling up these fruit-infused marshmallows in a basket for a summer barbecue or camping trip. they’re perfect for roasting over a fire or tossing into your s’mores for a fun twist.
And if you’re feeling adventurous, you could switch things up and try adding some cacao powder for a chocolatey spin.
Who wouldn’t want to dive into artisan marshmallows that are easy to make and loaded with natural flavor?
Oh, and let’s not forget that these are not just for the kids! (although, they will absolutely adore these sweet treats.
) think about serving them at your next brunch with friends, paired with a nice cup of coffee or hot cocoa.
Talk about elevating your snacking game!
Adventure Awaits in the Kitchen
If all of this sounds delicious (and trust me, it is), let’s dive into the ingredients you’re going to need.
This adventure starts with basing your marshmallows with some trusty gelatin and, of course, those vibrant raspberries! so grab your mixing bowls and get ready for a kitchen journey that will have you creating these delightful clean eating treats in no time.
Are you excited yet? Let’s gather those ingredients, and trust me, you’ll be amazed at what you’ll create!
Essential Ingredients Guide
Food is like an endless adventure, and trust me, having the right ingredients in your kitchen can make or break your culinary creation! whether you're after paleo desserts like those fluffy, homemade marshmallows , or just trying to jazz up a tuesday night dinner, knowing what you're dealing with is key.
Let’s dive into an essential ingredients guide that’ll set you up for kitchen success!
Premium Core Components
First off, every great dish starts with premium ingredients . For your basic staples, here’s what you need to know:
-
Measurements: Always keep a scale handy. For example, 1 cup of water is about 240 ml . Not much math needed, right? Make it easy!
-
Quality Indicators: Look for ingredients that smell fresh and vibrant. With fruits like raspberries, you're aiming for deep color and no bruising. Chocolate? Go for that rich aroma!
-
Storage guidelines: keep dry goods cool and dark. most spices like cinnamon can last a year or two if stored right.
Check labels for shelf life, and say goodbye to that 3-year-old flour!
-
Freshness Tips: When picking fruits, choose those that are firm and fragrant. If you’re going for gluten-free marshmallows or other healthy snacks, inspect for natural sweeteners like honey or maple syrup—no extra junk!
Signature Seasoning Blend
You can't whip up a storm without a killer spice game!
-
Essential Spice Combinations: Every cook needs a go-to blend—think smoked paprika, garlic powder, and a hint of cayenne.
-
Herb Selections: Fresh basil, thyme, and rosemary can throw a party in your mouth. Pair them wisely. Basil loves tomatoes; rosemary is great with potatoes.
-
Flavor Enhancers: Consider adding a splash of vinegar or a squeeze of citrus to elevate any dish. Don't sleep on garlic—it’s a superstar!
-
Regional Variations: Want to spice things up? Try Indian curry blends, or make those s'mores alternatives with a sprinkle of cinnamon during summer bonfires.
Smart Substitutions
It happens to the best of us—you realize you're out of something vital. Panic not!
-
Common Alternatives: Forget the sugar? Use applesauce! Running low on eggs? Flaxseed can do wonders for binding.
-
Dietary Modifications: For our vegan friends, coconut cream can replace heavy cream in many recipes. Just whip it up for that dreamy texture!
-
Emergency Replacements: If you don’t have fresh herbs, dried ones can still carry the flavor. Use 1/3 of the amount.
-
Seasonal Options: Opt for whatever’s in season. Fall? Incorporate pumpkins! Spring? Celebrate with fresh berries for those fruit-infused marshmallows .
Kitchen Equipment Essentials
Now, onto tools! Because let’s be real, cooking without the right gear is like trying to win Monopoly with a missing piece.
-
Must-Have Tools: You gotta have a mixing bowl, whisk, and a trusty saucepan. A candy thermometer is a game-changer if you’re diving into marshmallow-making tips .
-
Alternative Equipment Options: No stand mixer? A good old hand mixer works just fine. Don’t forget a spatula—it’s your best friend for scraping!
-
Preparation Tips: Always read through your recipe first. Set everything out (a.k.a. mise en place) so you’re not scrambling.
-
Storage Solutions: Keep those pantry items organized! Little jars or labeled bags can save you from ingredient confusion when you’re about to Make Paleo Marshmallows with Raspberry Flavor .
As you gear up to whip up some guilt-free indulgence , remember these essential guides the next time you hit the kitchen! Sure, cooking can seem overwhelming at times, but with the right ingredients and tools, it's a piece of cake—or should I say marshmallow ?
Ready to put all this info to work? let’s jump into the fun part—the instructions! get those hands ready to create some gorgeous, fluffy marshmallow goodness that’s perfect for summer or whenever you need a sweet treat.
Your kitchen’s about to transform into a hub of deliciousness!
Discover the Art of Professional Cooking
There's something extraordinary about stepping into a professional kitchen, isn’t there? the hustle, the sizzle, and the aroma wafting through the air make it a true culinary paradise.
So, whether you’re dreaming of cooking like a pro or just want to impress your friends at your next dinner party, let's break down a few essential steps to help you shine in the kitchen!
Essential Preparation Steps
First thing's first— mise en place . this french term means "everything in its place." trust me, having your ingredients prepped and organized will save you from scrambling around when you're in the zone.
Chop those veggies, measure out your spices, and set them at arm’s reach. the last thing you want is to be fumbling for the salt when your pasta is about to boil over!
Now, let’s talk time management. set a timer for yourself; it feels so official and helps keep you on track.
You can plan your cooking steps based on how long each one takes. for example, while your sauce simmers for 20 minutes , you could prep your salad!
Organization is key. keep your workspace tidy. a clutter-free environment not only makes cooking smoother but also gives you a mental boost.
Use designated spots for cutting boards, pots, and pans. you’ll be surprised how much easier it is!
And don't forget safety! Turn handles of pots inward to avoid knocking them over, and keep a first aid kit handy, just in case you need it. Accidents happen!
Step-by-Step Process
Here’s the fun part! Let's break it down into a simple, clear process:
- Gather your ingredients and tools. Ensure everything is within reach.
- Preheat your oven based on your recipe—usually between 350° F ( 175° C) to 400° F ( 200° C) .
- Cook with precision. Use a thermometer—your chicken is perfectly cooked at 165° F ( 74° C) . Trust me, food poisoning is NOT the cooking adventure you want.
- Time each step carefully. For instance, you might need to bake that casserole for 30 minutes just right. Use a timer!
- Look for visual cues . A golden-brown crust usually means your dish is done. If it jiggles a bit when you gently shake the pan, it may need a little more time. Listen to your food!
Expert Techniques
Want to elevate your cooking game? Here are some pro tips:
- Embrace searing . It adds flavor and depth to your dishes. Get your pan hot before adding meat; you'll see a beautiful crust form!
- When making sauces, always taste as you go. You can adjust flavors and seasonings that best suit your palate. No one wants bland food!
- Create a quality checkpoint . After each key step, assess your progress. Is the sauce thickening? Does the chicken smell heavenly? Good indicators you’re on the right track!
- And if things go south? Troubleshooting is key ! If your sauce is too runny, add a cornstarch slurry to thicken it up.
Success Strategies
We all make mistakes, right? Try to avoid these common cooking pitfalls:
- Don’t skip the prep. It’s crucial for smooth sailing.
- At first, follow the recipe carefully, but as you get comfortable, tweak and adjust it to match your taste.
- Always have a plan for leftovers. Can you say Paleo marshmallows with raspberry flavor ?! My gosh, the kids love ’em, and they’re so easy to whip up!
- Make-ahead options are your friend! Dishes like casseroles and marinated proteins can be prepared a day ahead.
With these pro tips and strategies, you’re set to create amazing meals. if you're keen to dive deeper into the delicious world of paleo desserts , don’t forget to try whipping up those delightful homemade marshmallows .
With that berry goodness, they’ll become your go-to summer dessert idea, perfect for guilt-free indulgence!
Stay tuned for the next section where we pull together all the tips and strategies you’ve learned into something delicious and perfect for your next gathering. It's going to be a blast!
Pro Tips & Secrets for Making Paleo Marshmallows
Let’s dive right into marshmallow-making tips because trust me, making your own is such a game-changer. when you learn how to make paleo marshmallows with raspberry flavor , you'll finally understand why people go nuts over homemade marshmallows .
First off, don’t skimp on the quality of your ingredients. use paleo-approved ingredients like raw honey or maple syrup. they give a rich flavor without any artificial junk.
Patience is key! it’s all about waiting for that gelatin to bloom. give it a solid 5– 10 minutes; that’s when magic happens.
And for the syrup, you’ll want to hit that sweet spot of 240° f ; you know you nailed it when it’s hot but not boiling over.
And don’t forget to jazz things up with a little vanilla extract —it elevates everything! oh, and a tip for storage: use an airtight container ; this keeps your gluten-free marshmallows soft and delicious for up to a week.
Seriously, you’ll want to snack on these everyday!
Perfect Presentation
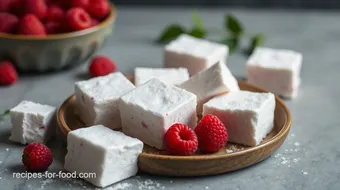
Alright, let’s talk about the fun part: plating techniques . who says marshmallows can't look gourmet? for a fab visual appeal, cut them into fun shapes—think hearts or stars .
Then, dust them lightly with that coconut flour and arrowroot combo to keep them from sticking. it adds a rustic look.
And garnishing? drizzle some extra raspberry puree on top. it not only makes them look drool-worthy but also packs in more flavor.
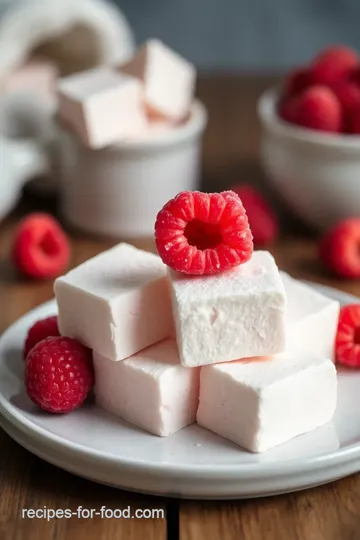
You can even add fresh raspberries next to your marshmallows for a pop of color. it’s all about those vibrant color combinations that make your dessert instagram-ready , am i right?
Storage & Make-Ahead
Now, if you're planning ahead, here’s where it gets super easy. you can totally make these marshmallows a day or two in advance.
Just remember to let them set for at least 4 hours, preferably overnight. once they’re all fluffy and ready, pop ‘em in an airtight container and keep them at room temperature.
If you want to preserve them longer, you could freeze them, but they’re best fresh! when it’s time to enjoy, just let them sit at room temp for about an hour to soften up.
Creative Variations
So, you’ve mastered the classic. now, let’s get crazy! try some flavor adaptations . why not switch up the raspberry for blueberries or even strawberries? it’s a fantastic way to get your fruit-infused marshmallows going.
If you’re feeling adventurous, a sprinkle of cayenne pepper gives it a spicy kick.
For anyone needing dietary modifications , swap honey for agave or maple syrup if you're sticking to a vegan lifestyle.
Feeling citrusy? lemon or lime puree provides a refreshing twist; perfect for summer!
Complete Nutrition Guide
Before you get to devouring your little pieces of joy, let’s talk nutrition. one serving (aka one marshmallow) has about 60 calories —not too shabby, right? it's a sweet treat without all the guilt! each marshmallow packs around 1g of protein and just 13g of sugar thanks to our natural sweeteners.
Perfect for those who need light and fluffy desserts in their lives, and they fit hand-in-hand with clean eating. Seriously, these are guilt-free indulgences that won't derail your health goals.
Wrapping It Up
So, what do you think? ready to dive into the world of artisan marshmallows ? making homemade marshmallows is a fun project, and i promise, it’s an instant crowd-pleaser, especially if you've got kids involved in the kitchen! you’ll feel so accomplished when you whip up your very own refreshing dessert options .
Give them a try—maybe for a summer barbecue or a cozy night-in with hot cocoa. whatever your vibe is, these paleo marshmallows will elevate your snack game to a whole new level.
Don't just dream about those fluffy little bites; make them happen! happy cooking, my friend!
Frequently Asked Questions
How do I Make Paleo Marshmallows with Raspberry Flavor?
To make Paleo marshmallows with raspberry flavor, start by blooming gelatin in water and then cook a mixture of honey and water to 240°F (115°C). Combine the thickened gelatin with the cooked syrup, add raspberry puree, and whip until fluffy. Finally, pour the mixture into a prepared pan and let it set for at least 4 hours before cutting into pieces.
Can I use frozen raspberries for this recipe?
Yes, frozen raspberries work great in this recipe! Just make sure to thaw them first and then puree them until smooth. You may want to strain the puree to remove any seeds for a smoother texture in your marshmallows.
How should I store my homemade raspberry marshmallows?
Store your homemade Paleo marshmallows in an airtight container at room temperature for up to 1 week. To prevent them from sticking together, dust the marshmallows with a mixture of arrowroot powder and coconut flour before sealing the container.
Can I make variations of these marshmallows?
Absolutely! You can experiment by adding different flavors, such as chocolate or citrus, or infusing herbs like lavender or mint. Just remember to balance the liquid content if you're adding more puree or extracts, to maintain the right consistency.
Do these marshmallows have any nutritional benefits?
Yes, these marshmallows are a lighter, more natural alternative to commercial marshmallows. Made with honey or maple syrup, they're sweetened naturally and contain gelatin, which may offer some protein and help support gut health. Keep in mind that moderation is key, as they are still a sweet treat!
What tips do you have for achieving the best texture with my marshmallows?
To achieve the best texture, ensure all your mixing equipment is clean and dry, as any grease can affect the whipping process. Use a candy thermometer for precise temperature control when cooking the syrup, and whip the mixture until it triples in volume and holds stiff peaks. Patience is key—don’t rush the setting process!
Raspberry Bliss: Make Paleo Marshmallows Card
⚖️ Ingredients:
- 1 cup (240 ml) water, divided
- 2 tablespoons (15 g) powdered gelatin (ensure it
- s Paleo-friendly)
- 1/4 cup (60 ml) honey or maple syrup
- 1/4 teaspoon (1 g) sea salt
- 1 teaspoon (5 ml) vanilla extract
- 1 cup (150 g) fresh or frozen raspberries, pureed
- 2 tablespoons (30 ml) raspberry puree (for drizzling and garnish)
- 1/4 cup (30 g) arrowroot powder
- 1/4 cup (30 g) coconut flour
🥄 Instructions:
- Step 1: Line an 8x8 inch baking pan with parchment paper and dust with a mix of arrowroot powder and coconut flour.
- Step 2: In a small bowl, combine 1/2 cup of water with powdered gelatin and let sit for 5-10 minutes until it thickens.
- Step 3: In a saucepan, combine the remaining 1/2 cup water, honey (or maple syrup), and sea salt. Heat over medium heat, stir until dissolved, then bring to a simmer.
- Step 4: Cook until the mixture reaches 240°F (115°C) using a candy thermometer.
- Step 5: Remove the syrup from heat, let it cool slightly, then add the bloomed gelatin and whisk until fully dissolved.
- Step 6: Pour the mixture into a bowl, add vanilla extract and raspberry puree. Whip on high speed until fluffy and holds stiff peaks.
- Step 7: Spread the marshmallow mixture into the prepared pan, using a spatula to smooth the top. Drizzle additional raspberry puree on top if desired.
- Step 8: Allow marshmallows to set at room temperature for at least 4 hours or overnight. Cut into desired shapes.
- Step 9: Dust cut edges with remaining arrowroot and coconut flour to prevent sticking. Store in an airtight container.
Previous Recipe: Discover My Quick Paleo Coconut Soup with Zoodles: A Simple Comfort!
Next Recipe: How to Make Quick Almond Joy Lara Bars - Healthy Snack for Any Day