Quick & Delicious Homemade Paneer
Have you ever tried making homemade paneer? It's a delightful experience! My fun twist on this creamy Indian cheese—Make Homemade Paneer - Quick & Delicious!

Oh my gosh, let me tell you about the first time i tried making my own cheese! it was last summer when i thought, "why not make homemade paneer - quick & delicious?" i gathered my kids in the kitchen, thinking it’d be a fun little science experiment.
Spoiler alert: it totally was! the look on their faces when the milk curdled was priceless. it felt like i had unlocked a magical door to indian cuisine—one that smelled like home and comfort.
This was the moment i realized homemade cheese is not just about cooking; it's about creating memories.
Now, if you’re wondering, “what’s the deal with this homemade cheese?” let me break it down for you. paneer , often referred to as indian cheese , originated in the indian subcontinent.
It’s super versatile—it adds creaminess to curries, grain bowls, and even salads! with its mild flavor, it just soaks up spices and flavors.
And you know what’s the best part? you can whip it up right in your own kitchen without needing any fancy equipment.
Just simple ingredients make this easy paneer recipe a straightforward process even for novice cooks!
Recipe Overview
Let’s chat a little bit about paneer, shall we? this delightful cheese goes way back in history. not only is it a staple in indian cuisine, but it's also gaining traction here in the states.
You’ll see it popping up in restaurants, farmer's markets, and even on social media with hashtags like #paneerfordays! now, if you’re crunched for time, don’t sweat it.
You’ll need about 55 minutes total— 15 minutes to prep and another 10 for cooking. yep, that’s it! even the busiest of us can squeeze that in!
And don’t break the bank while you’re at it. making your own paneer is generally cheaper than buying pre-made, plus you get a yield of about 2 cups of this creamy goodness—around 8 servings.
If you’re planning to slide some into a delicious palak paneer or savory paneer tikka, you’re gonna want that stash ready.
Key Benefits
Now, let’s get into the juicy bits: the benefits of making paneer at home! first off, paneer nutritional benefits are pretty impressive.
It’s high in protein, which makes it a fantastic option for vegetarians, and it's packed with calcium—you know, great for those bones! only 70 calories per serving? sign me up!
And here's a kicker: when you make your own paneer, you can control everything from the ingredients to how creamy it turns out.
Want it extra soft? just follow my paneer cooking tips for that dreamy texture. plus, it’s perfect for special occasions, whether you’re hosting a cozy dinner or a festive gathering.
You might even want to show off your skills at the next family potluck!
This homemade cheese also stands out from processed options because it contains no preservatives or weird additives. oh, and did i mention it’s a fun activity to do with family or friends? just gather ‘round, have some laughs, and maybe a little chaos in the kitchen.
That’s what cooking is all about, right? afraid of making a mess? believe me, the payoff of fresh, creamy paneer is totally worth it!
So, as you get ready to roll up your sleeves and get this adventure started, let’s grab those paneer ingredients and dive into the sections that will guide you step by step—not just in making this creamy delight but also in bonding over a shared love for good food!
Essential Ingredients Guide for Homemade Paneer Lovers
When it comes to making homemade cheese , especially paneer , having the right ingredients is crucial. let’s break it down so you’ll know exactly what you need, why you need it, and how to store it like a pro! honestly, understanding your ingredients can make cooking so much more fun.
It’s like assembling your dream team for a cooking adventure!
The Premium Core Components
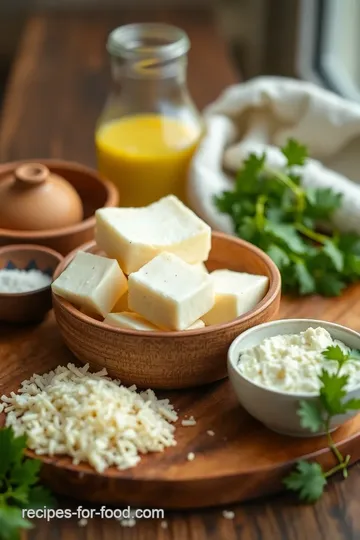
First off, let’s talk about the big dogs in your ingredient lineup. for any easy paneer recipe , you’ll need 1 gallon of whole milk (that’s about 3.
8 liters if you're into metrics) and 1/4 cup of lemon juice or vinegar (roughly 60 ml ).
Now, here’s a quick rundown:
- Quality Indicators: Always go for fresh, high-quality whole milk . The best milk for paneer makes all the difference in taste. Look for milk that isn’t ultra-pasteurized.
- Storage Guidelines: Unopened milk can usually last about a week after its "sell-by" date in the fridge. Once you’ve opened it, use it up in about 5-7 days. Vinegar? It lasts forever in your pantry!
- Freshness Tips: Sniff your milk before cooking. If it smells sour, it’s time to say goodbye. Trust your nose on this one!
Fresh ingredients lead to delicious results, and since you’re learning how to make paneer, let’s keep things as fresh as possible!
Signature Seasoning Blend
Paneer’s greatness lies in its versatility. like a blank canvas, it gets its personality from the spices you choose. while traditional paneer is soft and mildly flavored, you can jazz it up with herbs or spices.
Try pairing it with some cumin or adding a bit of turmeric for color.
Here’s the kicker – regional variations are where the magic happens! depending on where you’re from (or where you traveled), you might find unique spice blends.
In southern india, people might add curry leaves, while in northern kitchens, they might stick to garam masala. play around!
Smart Substitutions
We all know life happens. If you're out of something or you wanna go for a vegan approach, no worries, I got your back!
- Common Alternatives: If you don’t have lemon juice, white vinegar does the trick too. Or go for a vegan lemon yogurt if you want that creamy texture without the dairy.
- Emergency Replacements: If you find yourself short on cheesecloth, a fine mesh strainer or even an old t-shirt can save the day. Just make sure it’s clean, obviously!
Dietary Modifications: There are tons of vegan paneer alternatives popping up, like tofu! It's a great stand-in if you're looking to adjust for a plant-based diet.
Kitchen Equipment Essentials
Now that we’re all geared up with ingredients, let’s get the right tools in order!
- Must-Have Tools: You’ll need a large stainless steel pot (don’t use non-stick, please!), a slotted spoon, and a heavy object for pressing your homemade cheese into shape.
- Prep Tips: Don’t forget to have your cheesecloth or strainer ready for the curds. The last thing you want is a hot mess (literally).
- Storage Solutions: Once you have that creamy paneer made, keep it fresh by submerging it in water in the fridge. This keeps it soft and tasty for longer.
So, now that we’ve covered the essentials, ingredients, and tools, get excited because you are just moments away from discovering how to make homemade paneer - quick & delicious ! trust me, you’ll want to dive right into those step-by-step instructions next.
Your kitchen is about to get a whole lot cheesier and more delicious. keep it cozy, and let’s get cooking!
Quick & Delicious Homemade Paneer: A Creamy Indian Delight
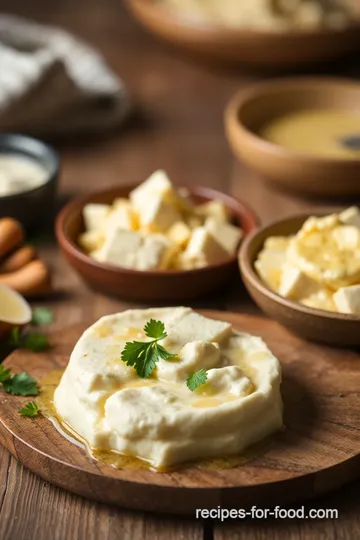
Oh my gosh, if you’ve never tried making your own paneer at home, you’re in for a treat! seriously, making homemade cheese like this is so satisfying.
Imagine creamy, soft cheese that you just whipped up in your kitchen. whether you’re whipping up some palak paneer or making a quick cheese platter, your dishes will shine when you make homemade paneer—quick & delicious.
Let’s dive into this easy paneer recipe that’s perfect even for novice cooks.
Essential Preparation Steps
Before you start cooking, let's talk about some essential steps. first up is mise en place . this fancy french term just means "everything in its place.
" gather all your ingredients together—grab 1 gallon of whole milk and 1/4 cup of lemon juice or vinegar. you’ll also want some cheesecloth or a fine mesh strainer handy to drain it all.
Then comes time management. seriously, timing is everything! you’ll need about 15 minutes of prep , 10 minutes to cook , and a bit of chilling time after.
Plan around this if you’re making dinner. otherwise, you might end up with ten hungry folks staring at you.
And hey, safety first! Watch those boiling milk bubbles—trust me, they’re sneaky and can get out of hand. Towel mitts are your friends!
Step-by-Step Process
Alright, let’s make this paneer! Here’s your step-by-step guide :
-
Heat the milk: pour your milk into a large pot and heat it over medium heat. stir occasionally, and make sure it reaches a gentle boil, about 210° f .
You’ll know it’s ready when you see little bubbles forming around the edges.
-
Add Acid: Once it boils, take it off the heat and slowly add your lemon juice or vinegar while stirring gently. You’ll see it start to curdle—this is the magical moment!
-
Strain the curds: line your colander with cheesecloth. pour the mixture in and let the whey drain. rinse the curds with cold water to wash away that tangy taste from the acid.
This part is key for a milder flavor.
-
Press the paneer: gather the cheesecloth into a bundle and twist it to squeeze out excess whey. place something heavy on top (a big pot works great), and let it sit for about 20- 30 minutes .
It’ll start to shape up nicely!
-
Cut & Store: Once pressed, pop it out from the cheesecloth, cut it up, and you’re ready to use it! Store the cubes in some fresh water to keep them moist.
Expert Techniques
Now, if you want your paneer to be the best , here are some expert techniques. always start with fresh, high-quality milk for the smoothest texture.
And for some creamy goodness, add a splash of heavy cream to your milk before heating.
If you make a mistake and your curds don’t separate properly, don’t panic! just give it a little more acid and reheat it gently.
This might need a little experimentation, but it’s all about learning!
Success Strategies
One of the most common mistakes? skipping the rinsing step after straining. it’s super important to remove that acid flavor for a fresh paneer that’ll shine in any dish.
As long as you keep an eye on your temperatures and timing, you’re golden.
And here’s a pro tip: make-ahead options are a life-saver! you can prepare it the night before and use it in your dishes the next day.
This homemade dairy product is a staple in indian cuisine now!
Additional Information...
I hope this encourages you to step into the world of cheese making at home . whether you’re crafting paneer for your favorite curry or experimenting with flavored paneer options , the possibilities are endless.
So get started and impress your friends with your homemade cheese skills. trust me, once you know how to make paneer easily, you'll never want store-bought again! happy cooking!
Crafting Your Own Creamy Paneer: All the Insider Tips
So, you’re ready to dive into the world of homemade cheese, huh? making paneer at home is super easy and oh-so rewarding.
It’s like crafting your own little block of joy! if you want to make homemade paneer - quick & delicious , you’ve come to the right place.
Grab a cup of coffee (or chai, if that’s your thing), pull up a chair, and let’s get into some juicy details.
Pro Tips & Secrets
Okay, let's talk about making this process smoother. here are some tips from my personal kitchen adventures. first , always choose high-quality whole milk .
The creamier the milk, the creamier the paneer! think of it as the foundation of a great cheeseburger—only with cheese!
Timing matters too . once you pour in the lemon juice or vinegar, gently stir the milk but don’t go wild! you want to see those lovely curds separate from the whey without a ton of splashing.
This is the curdled milk recipe magic happening!
Now, let's get fancy for a sec. for a bit of a flavor boost, you can toss in a pinch of salt or even some herbs like fresh cilantro while the milk is heating up.
It’s those little touches that make your paneer dishes sing.
Perfect Presentation
After you’ve made that beautiful, fresh paneer, let’s talk about presentation. You know, it's all about the 'wow' factor when you serve up your culinary creations.
Try cutting your paneer into nice cubes and arranging them on a bed of greens or a tangy salad. drizzle some olive oil or a sprinkle of red chili flakes on top for a pop of color and flavor.
You could also consider garnishing with fresh mint or parsley . trust me, it makes the dish look gourmet, even if you just whipped it up in your cozy kitchen.
And if you want to go the extra mile, serve your paneer with a drizzle of homemade mint chutney . It doesn’t just taste good; it looks freaking fabulous!
Storage & Make-Ahead
Oh man, let’s talk life savers here. if you’ve made too much paneer (lol, is that even possible?), here’s how you can store it.
You can pop it in a container filled with water and put it in the fridge. it’ll stay fresh for about a week.
For any leftovers after cooking, store them in an airtight container to keep them from drying out. when you're ready to use it again, just pop it in the microwave for a few seconds or toss it in a hot pan.
Voila, it's as good as new!
Creative Variations
Now here’s where the fun begins—the creative variations ! don’t hesitate to mix things up a bit. add in some spices.
You can make spicy paneer by tossing in some ground cumin or chili powder to your milk mixture.
Are you going plant-based? consider using vegan alternatives like coconut milk for a twist that’s both creamy and dairy-free. you’re not just stuck with the classic; you can really play around.
Experiment with a little saffron for a decadent flavor, or throw in some herbs to create unique flavored paneer options .
Complete Nutrition Guide
Alright, let’s get serious for a second. Paneer is packed with benefits. It’s high in protein and a great source of calcium, making it not just delicious but also a healthy option, especially for those kooky vegetarians among us! One serving has around 70 calories and 6 grams of protein—score!
Don't forget to keep an eye on portions. Even with all that nutrition, moderation is key, especially if you're planning to serve paneer at the next family gathering or potluck!
Expert FAQ Solutions
You might be wondering—what if my paneer doesn’t curdle? chill, it happens. just add a bit more acid, but slowly.
Sometimes you just need to coax it along, like a stubborn cat. and if your paneer seems a tad dry, here’s a pro tip: try using a bit of cream in the process .
This will boost the creaminess and make it more enjoyable in your recipes.
Wrapping Up
So, there you have it! making homemade paneer can be almost effortless, and you get to learn a bit more about indian cuisine essentials along the way.
Whether you're whipping it up for a party or just craving a quick indian recipe at home, making your own paneer feels like such a win! you’re basically a cheese wizard now.
So, grab your milk, get that acid ready, and embrace the joy of simple paneer making . trust me; it’s absolutely worth every curdle! happy cooking!

Quick & Delicious Homemade Paneer Card

⚖️ Ingredients:
- 1 gallon whole milk (3.8 liters)
- 1/4 cup lemon juice or vinegar (60 ml)
- Cheesecloth or a fine mesh strainer for draining
🥄 Instructions:
- Step 1: Pour the milk into a large stainless steel pot and heat over medium heat until it reaches a gentle boil, stirring occasionally.
- Step 2: As soon as the milk starts to boil, remove it from the heat. Gradually stir in the lemon juice or vinegar until the milk curdles.
- Step 3: Line a colander with cheesecloth and pour the curds and whey into the colander to strain. Rinse the curds under cold water.
- Step 4: Gather the corners of the cheesecloth and twist to form a tight bundle. Place a heavy object on top to press out excess whey.
- Step 5: Remove the paneer from the cheesecloth, cut it into cubes, and store in water or use immediately.
Previous Recipe: Easy Ways to Make Spicy Dark Chocolate Truffles: A Fiery Treat!
Next Recipe: Discover My Ultimate Sautéed Lentils with Spinach & Veggies: A Cozy Comfort Food!