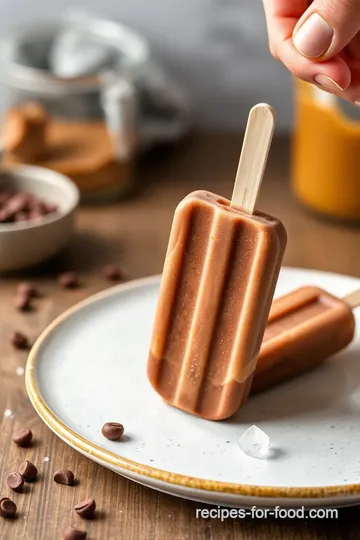
Creamy Peanut Butter Chocolate Popsicles
Looking for a cool way to beat the heat? Try my Freeze Peanut Butter Chocolate Popsicles! They're indulgent, easy to make, and irresistible for both kids and adults.

- Beat the Heat with Freeze Peanut Butter Chocolate Popsicles
- Essential Ingredients Guide: Your Go-To for Frozen Treats
- Mastering Professional Cooking: Your Gateway to Epic Frozen Treats
- Pro Tips & Secrets
- Perfect Presentation
- Storage & Make-Ahead
- Creative Variations
- Complete Nutrition Guide
- Expert FAQ Solutions
- Recipe Card
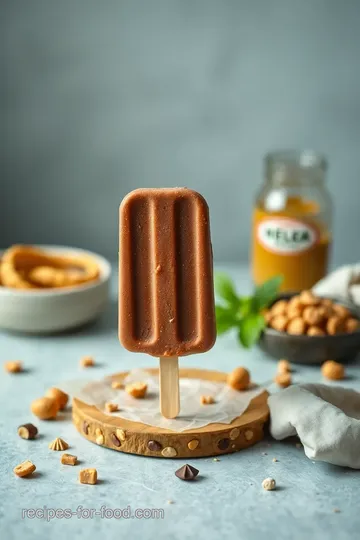
Beat the Heat with Freeze Peanut Butter Chocolate Popsicles
Oh my gosh, do you remember those hot summer days when all you wanted was something cool and sweet? the memory of running around outside, sticky with popsicle juice, is still fresh in my mind! fast forward to today, and i’m still chasing that feeling, especially when i discovered how to freeze peanut butter chocolate popsicles .
Seriously, these bites of joy are the ultimate treat for anyone craving a creamy, sweet, and nutritious frozen snack. trust me, you and your kids will totally love them!
Craving a Classic: The History Behind the Popsicle
Let’s talk a little about how we got here. the popsicle has a long history, dating back to the early 1900s.
Legend has it that an 11-year-old named frank epperson accidentally invented it when he left a mixture of soda and water outside overnight.
Talk about an accident turned innovation, right? nowadays, popsicles are a staple in households across america, especially during those scorching summer months.
They come in all shapes and flavors, but guess what? peanut butter popsicles have taken the spotlight recently, blending that salty-sweet vibe we all can't get enough of.
Making these tasty treats is super easy. you need just 15 minutes to whip everything together, but you have to wait around 6 hours for the freezing.
Perfect time for binge-watching your favorite show! plus, it’s a no-cook dessert recipe , meaning no extra hassle. that's right, you won't even need to turn on the stovetop.
And best of all? it’s budget-friendly!
Popsicles with Benefits: Why You'll Love Them
Not to sound like i'm selling you a used car, but let me tell you why these freeze peanut butter chocolate popsicles are a gem in your freezer.
First off, they’re healthy —yep, you heard that right! with simple ingredients like almond milk, honey, and peanut butter, you’re getting a dose of protein and healthy fats.
And let’s be real: how often can you find healthy frozen treats that are also delicious ?
These pops are fantastic for those summer kids' parties or even just a quiet night in! want to impress your friends? serve them at a bbq or family gathering, and watch how quickly they disappear.
You’ll be known as the popsicle wizard in no time. now, let’s chat about the key advantages over other popsicle flavors.
Unlike those sugar-loaded commercial versions, these guys are guilt-free. you can use alternative sweeteners if you’re looking to cut back on sugar or make vegan popsicles by swapping ingredients.
Plus, they’re super versatile! You can experiment with different nut butters or throw in some fruits for a fun twist—imagine strawberry-peanut butter pops. YUM!
Transitioning to Ingredients: Let’s Make Some Magic!
Now that you’re sold on these awesome frozen peanut butter desserts , let’s get to the fun part: the ingredients ! you’ll find the list simple, with items that are likely already hanging out in your kitchen.
Gather your popsicle molds , mixing bowl, and good vibes, and we’ll dive into making the best chocolate popsicles recipe ever.
Trust me, you don’t want to miss out on creating these creamy, dreamy treats.
Are you ready? Let’s go!

Essential Ingredients Guide: Your Go-To for Frozen Treats
When summer rolls around, there’s nothing quite like a creamy peanut butter chocolate popsicle to keep you cool. but before we dive into that delicious frozen dessert, let’s chat about some essential ingredients that’ll make any homemade popsicle a breeze.
I promise it’s way easier than it sounds, and you’ll be the star of your next summer gathering!
Premium Core Components
First up, let’s break down what you’ll need. For our peanut butter popsicles, detailed measurements are key. In the U.S., you'll want to grab:
- 1 cup (240 ml) unsweetened almond milk
- ½ cup (160 g) creamy peanut butter
- ¼ cup (60 ml) honey or maple syrup
- 1 teaspoon vanilla extract
If you’re measuring in metric , just remember these straightforward conversions. It's like riding a bike!
Now, about quality indicators : go for peanut butter that’s smooth and has minimal ingredients. you want to avoid the sugary stuff that’s basically dessert in a jar, ya know? for honey or maple syrup, look for pure options.
When it comes to storage, keep your popsicles in airtight containers in the freezer. they’ll stick around for about 2-3 months, but let’s be honest, they'll probably vanish way before that!
Oh, and here’s a little freshness tip —always check your peanut butter for those little oil pools on the top. Give it a good stir!
Signature Seasoning Blend
Let’s spice things up! while our peanut butter and chocolate are the stars here, adding some herbs might sound weird, but you can play with flavors.
Mint or sea salt can enhance that sweet and salty vibe if you’re feeling adventurous.
For the chocolate coating, remember to choose semi-sweet chocolate— quality matters and ensures your popsicles are rich and smooth. it’s like wrapping your dessert in a lovely blanket of chocolatey goodness.
Trust me, once you dip those babies, there’s no going back!
Smart Substitutions
Now, if you're out of peanut butter, don't sweat it. common alternatives include almond or cashew butter. seriously, any nut butter will do.
If you want to go dairy-free, just swap almond milk with coconut milk or any nut milk you like. the result? still creamy, still tasty!
Now, for those dietary modifications, if you need a guilt-free dessert , you can use alternative sweeteners like stevia or erythritol. Your waistline will thank you, and hey, they still taste bomb!
Kitchen Equipment Essentials
Moving on to the tools of the trade! you’ll need popsicle molds . it doesn’t have to be fancy; even a silicone mold does the trick.
Honestly, i’ve experimented with all sorts of molds, and i’ve found that the simpler, the better. no need for your kitchen gadgets for frozen treats to be complicated!
As for preparation tips? make sure to whisk that mixture well until it’s smooth . if you want a little flair, toss in chopped nuts or mini chocolate chips for a fun twist.
Oh! and when you’re ready to release your popsicles, run warm water over the outside of the mold. it helps them pop right out, no fuss!
Sweet Closing
Alright, friends, now that you’re armed with all the basics, let’s dive into making these freeze peanut butter chocolate popsicles ! who doesn’t love a quick popsicle recipe that’s not only a delight during those crazy hot days but also a hit with the kiddos? plus, you can whip these up in under 15 minutes , and the rest is just waiting for your freezer to do its magic.
Get ready to impress your friends and family with your very own healthy frozen treats that are sure to become your go-to summer snacks!
Are you as excited as I am? Let’s get to those step-by-step instructions and turn that peanut butter and chocolate into a dreamy frozen treat!
Mastering Professional Cooking: Your Gateway to Epic Frozen Treats
Alright, my friends, let’s talk about a professional cooking method that not only makes your kitchen feel more like a culinary haven but will take your frozen dessert game to the next level.
I mean, who wouldn’t want to whip up something as delightful as freeze peanut butter chocolate popsicles ? these creamy, dreamy treats are perfect for summer and oh-so-easy to make—it's like a hug from your freezer!
Essential Preparation Steps
Before you dive right in, mise en place is your best friend. seriously, chop, measure, and prep all your ingredients first.
Having everything in its place makes the whole process smoother and helps you avoid those “oh wait, i need that!” moments (we’ve all had them!).
And let’s chat about time management . you want your popsicles frozen and ready for that sunny afternoon, so plan ahead.
The actual prep takes about 15 minutes , but you'll need to let them hang out in the freezer for at least 6 hours .
Keeping your workspace organized is key. set an area for your ingredients, tools, and a spot for the finished pops.
And safety? be mindful of your popsicle sticks—don't poke yourself, and make sure you’re using clean tools.
Step-by-Step Process
Now, let’s break it down. Here’s how to get that delectable chocolatey-peanut butter goodness into your mouth, step by step.
-
Make the base: first, you’ll want to mix your base. in a bowl, combine 1 cup of unsweetened almond milk , ½ cup of creamy peanut butter , ¼ cup honey , and a splash of vanilla extract .
Whisk it until it’s smooth, which should take just a couple minutes.
-
Fill Up Those Molds: Pour the mixture into your popsicle molds, leaving a bit of space at the top (trust me, it expands when it freezes).
-
Time to Freeze: Insert your popsicle sticks and toss those babies in the freezer for at least 6 hours . No peeking!
-
Get saucy: for the chocolate coating, melt ½ cup of semi-sweet chocolate chips with 1 tablespoon of coconut oil in a microwave.
Nuke it in 30-second intervals , stirring until smooth. that’s your chocolate goodness right there.
-
Dip ‘n’ freeze: once your popsicles are solid, remove them from the molds (a quick dip in warm water can help).
Dip them into that chocolatey coating and lay them on a baking sheet lined with parchment paper. freeze for another 30 minutes to let the chocolate set.
Expert Techniques
So, what's the pro way to get these treats just right? for one, make sure you're using room temperature peanut butter.
It mixes better and prevents clumps. if you want an extra layer of fun, try stirring in some chopped nuts or mini chocolate chips before freezing.
And if your chocolate coating isn’t smooth, just add a tad more coconut oil—the silky finish makes all the difference.
If you find your popsicles are sticking, soak the molds in warm water for a few seconds to make releasing them a breeze!
Success Strategies
Avoid common mishaps! A classic rookie mistake? Overfilling those molds. Leave a bit of room for expansion and air. Sometimes sweetness can be subjective, so adjust the honey to your taste.
For guaranteed quality, double-check the freezing time. Trust me, a few extra hours never hurt anyone. You want them rock-solid, not slushy!
Now, if you’re one to prep ahead, consider making these pops first thing in the morning and letting them chill out while you go about your day.
You’ll be thanking yourself later when you have a cold and tasty snack ready to go!
Additional Information
In closing, finding that balance of flavor and texture can elevate your dessert game immensely. so, why not impress your friends and family with homemade popsicles? they will love you for these creamy frozen treats! and with so many variations, you’ll never run out of ideas for healthy frozen snacks.
So, grab your popsicle molds and get ready to enjoy something that feels like a premium dessert but is so easy to whip up right at home. Happy freezing, y’all!
Pro Tips & Secrets
Now, let’s get down to my top pro tips for those freeze peanut butter chocolate popsicles ! first off, when you're mixing the peanut butter, try to use it at room temperature.
It makes a world of difference in how easily it blends into the almond milk. honestly, no one wants a chunky popsicle, you know?
Wanna save time? make a double batch! freeze half for later. you're welcome! and remember: don’t skimp on the vanilla.
It truly amps up the flavor. if you want an extra kick, a pinch of sea salt can turn your sweet and salty popsicles into a ridiculously good treat.
And for the chocolate coating, i’ve got a little secret: stir in a tablespoon of coconut oil while melting the chocolate.
It helps the chocolate glide on smoothly and adds a nice sheen. trust me, your popsicle game just leveled up!
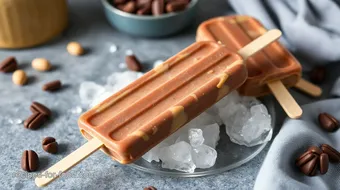
Perfect Presentation
Okay, let’s talk about presentation because a good-looking dessert can make it taste even better! when assembling your popsicle molds , leave a tiny bit of room at the top; it’ll expand while freezing.
If you want to jazz them up a bit, sprinkle crushed nuts or colorful sprinkles before freezing.
For garnishing , think fresh! a little drizzle of chocolate sauce on top right before serving? yes, please! and if you have fresh berries lying around, those will not only add a pop of color but also some freshness to your chilled dessert.
Storage & Make-Ahead
Wanna keep your popsicles tasting as good as the first day? pop these beauties in an airtight container and they'll keep for about two weeks in the freezer.
Trust me, i’ve had my fair share of freezer disasters, so that’s a rule i stand by!
If you plan to make them ahead of time, go for it! just remember to label them. once they’re frozen solid, you can easily grab a popsicle for a quick, healthy snack .
Creative Variations
Feeling a bit adventurous? let’s chat about variations ! you can totally throw in a banana for a creamy banana-peanut butter twist.
Want it more decadent? layer in crushed cookies or mini chocolate chips before freezing.
Think seasonal—swap out the creamy peanut butter for pumpkin puree in the fall! yum! and, if you’re feeling fancy, try drizzling some caramel on these babies for a gourmet touch.
The world is your popsicle!
Complete Nutrition Guide
Now, i know we all want to enjoy something sweet without the guilt. each peanut butter popsicle is about 200 calories, which isn’t bad for a frozen dessert ! plus, you’re getting protein from the peanut butter and healthy fats.
And guess what? these are also dairy-free (cue the applause for the almond milk )! you can feel good about giving these to your kids as a snack idea for hot summer days.
For those counting carbs or sugars, just swap honey for an alternative sweetener like stevia or erythritol.
Expert FAQ Solutions
You got questions? i’ve got answers! one common issue folks run into is popsicles being hard to remove from the molds.
Here’s a quick fix: just run the molds under warm water for a few seconds before pulling them out. easy peasy!
If your chocolate coating doesn't set perfectly, don’t stress! pop them back in the freezer for a bit longer. another tip—if your popsicles come out too icy, it might be a sign you need to whisk the mixture better.
Gotta get that creamy texture right!
So there you have it, friends! making freeze peanut butter chocolate popsicles isn’t just easy; it’s a culinary adventure waiting to happen.
With these tips, tricks, and variations, every bite becomes a delicious moment to savor.
These popsicles are not just a treat, they're a joyful experience, a healthy frozen dessert you can whip up any time.
Whether you're cooling off on a hot summer day or need a fun snack idea for the kids, these popsicles will hit the spot.
So, grab those molds and get popping! You’re in for a sweet ride!
Creamy Peanut Butter Chocolate Popsicles Card
⚖️ Ingredients:
- 1 cup (240 ml) unsweetened almond milk (or whole milk)
- ½ cup (160 g) creamy peanut butter
- ¼ cup (60 ml) honey or maple syrup (adjust to taste)
- 1 teaspoon vanilla extract
- ½ cup (90 g) semi-sweet chocolate chips
- 1 tablespoon coconut oil
🥄 Instructions:
- Step 1: In a mixing bowl, whisk together almond milk, peanut butter, honey (or maple syrup), and vanilla extract until smooth.
- Step 2: Pour the mixture evenly into the popsicle molds, leaving a little space at the top for expansion.
- Step 3: Insert popsicle sticks and freeze for at least 6 hours, or until solid.
- Step 4: In a microwave-safe bowl, combine chocolate chips and coconut oil.
- Step 5: Microwave in 30-second intervals, stirring until completely melted and smooth.
- Step 6: Remove popsicles from molds and dip them into the melted chocolate coating.
- Step 7: Place on a baking sheet lined with parchment paper and return to the freezer for 30 minutes or until the chocolate is set.
Previous Recipe: How to Cook Blueberry Chia Jam with Healthy Twist: A Delicious & Easy Recipe
Next Recipe: Easy Ways to Muddle Blueberries for Refreshing Mojitos Bliss