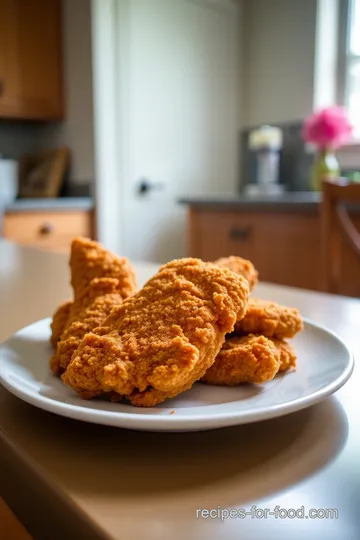
Crispy Gluten-Free Chicken Tenders
Craving the crunch of Raising Cane's gluten-free chicken? Try my homemade version! Juicy, flavorful, and perfect for any family gathering. Here's how!

- A Crispy Adventure in Gluten-Free Chicken Tenders
- Recipe Overview: The Crunchy Backstory
- Why You’ll Love This Recipe
- Transitioning to the Ingredients: Let’s Gather ‘Em Up!
- Your Go-To Guide for Essential Ingredients
- Mastering the Art of Professional Cooking: Your Go-To Guide
- Additional Recipe Information
- Recipe Card
A Crispy Adventure in Gluten-Free Chicken Tenders
So, picture this: it's saturday afternoon, and i find myself with some time to spare. the sun is out, the kids are bouncing off the walls, and all they can talk about is chicken tenders.
My husband pipes in, "um, how about we hit up raising cane's?" and i think, “why not whip up something just as delightful at home?” that's when i had my aha moment: crispy gluten-free chicken tenders inspired by raising cane’s !
Honestly, not everyone wants to run out for fast food, especially when you can whip up something delicious, full of flavors , and free of gluten in your own kitchen.
Trust me, once you try this easy fried chicken tenders recipe, it’ll become a staple for those busy weekdays or those chill sunday game days.
Recipe Overview: The Crunchy Backstory
Now, let’s flip the calendar back a bit. chicken tenders have been a go-to dish in american cuisine since forever.
Growing up, we were all about those southern-style chicken tenders. they scream comfort food, don't they? but nowadays, with more folks opting for gluten-free diets, those tasty strips had to evolve.
That’s where our raising cane's inspired recipe takes the stage!
In terms of cooking time, you'll snag this crispy goodness in about 55 minutes —that includes a quick prep, marination, and frying.
It’s easy enough for beginner cooks, but the results’ll make you feel like a total pro. and, let’s not kid around, making this at home often saves you some bucks too! this recipe serves four people, making it a great family-friendly gluten-free meal!
Why You’ll Love This Recipe
Here’s the kicker—these crispy chicken tenders aren’t just about a good crunch. they bring a ton of benefits to the table.
First off, they’re made with gluten-free breadcrumbs and cornstarch , so you dodge all those gluten issues while still enjoying mouthwatering flavor.
Talk about gluten-free comfort food !
Plus, they’re packed with protein because, you know, who can say no to chicken? you can serve them up as the star of the dinner plate or whip them out for a gluten-free party appetizer .
And with an amazing side—think crispy fries or a light salad—you're golden!
Not to mention, they are a fabulous option for kids. with just a simple tweak here and there, like some kickin’ chicken seasoning or even a splash of buttermilk in the marinade, you can have a dish that's friendly for even the pickiest of eaters.
Trust me, my kids would choose these over any fast food nugget, hands down.
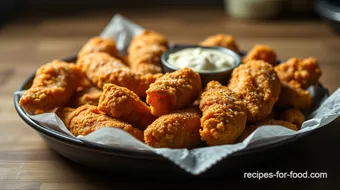
When it comes to special occasions , consider putting these crispy delights out for game day or movie night. Dip them in your favorite sauce—homemade ranch dressing, anyone?—and you’re set for some quality family time!
Transitioning to the Ingredients: Let’s Gather ‘Em Up!
Alright, my friends, enough chatting! it’s time to get down to business and talk ingredients. you’ll need some simple stuff, nothing fancy here.
Just grab some chicken breasts, your favorite gluten-free breadcrumbs, a few spices, and you'll be golden. trust me; this is the moment when the magic happens, turning those simple ingredients into something unforgettable.
As we dive into the ingredient list, think about all the fun you’ll have crafting these tenders. You’re about to change the game in your kitchen—and every bite? Pure bliss! Let’s assemble our list and get started!

Your Go-To Guide for Essential Ingredients
Cooking can be a wild ride, you know? it’s an adventure in flavor, texture, and creativity. and for those of us navigating gluten-free options—like whipping up some crispy chicken tenders inspired by raising cane's —having a solid essential ingredients guide is a total game changer.
Let’s break it down!
Premium Core Components
First things first. when it comes to your ingredients, quality is key. grab yourself some premium chicken (aim for about 1 pound or 450g) for those mouth-watering tenders.
This is how we make a gluten-free chicken recipe that shines.
Detailed measurements work wonders! Here’s a little breakdown for you:
- Buttermilk: ½ cup (120ml)
- Gluten-free breadcrumbs: 1 cup (100g)
This ensures everything’s on point, whether you stick with US measures or go metric.
Storage guidelines? sure thing! keep chicken in the fridge if you're not cooking it right away, and those gluten-free breadcrumbs should be stored in a cool, dry place.
Generally, they last for months if unopened!
Freshness tips? Always rely on your senses! For chicken, check for a nice pink color and not that sketchy, grayish hue. Flavor is everything.
Signature Seasoning Blend
Now let’s jazz things up with a signature seasoning blend . this is where your chicken tender seasoning really struts its stuff! mix things up with a teaspoon of paprika and a half teaspoon of garlic powder and onion powder.
Oh my gosh, just smelling that combo gets me excited!
Consider pairing your spices with herbs like oregano —perfect for a southern-style twist. you can even play with local flair.
Like, if you’re from the south, you might wanna stir in a pinch of cayenne pepper for that extra kick!
Smart Substitutions
Now let’s keep it real—we all know sometimes we don’t have exactly what we need in the pantry. That’s when Smart Substitutions come in handy.
Let’s say you’re out of buttermilk? just mix regular or plant-based milk with a tablespoon of vinegar; it’s a lifesaver! and if you prefer, you can swap out gluten-free breadcrumbs with panko for extra crunch.
It’s a small twist that makes a big difference.
Kitchen Equipment Essentials
You’re ready to roll, but don’t forget your kitchen equipment essentials . you don’t need a crazy setup! basic tools do the trick.
A large skillet for frying (aim for medium-high heat, around 350° f/ 175° c ) and some tongs or a slotted spoon will get you through.
Also, have shallow bowls on deck for marinating and breading—that’s where the magic happens! And trust me, you wanna drain your cooking on some paper towels to keep those tenders crispy.
Closing Thoughts and a Teaser for What's Next
Cooking is all about creativity and mixing things up! remember, you don’t have to be a pro to whip up easy fried chicken tenders .
Each step of the way is about learning what works for you, and embracing those family-friendly gluten-free meals we all crave.
In our next section, we’ll dive into step-by-step instructions for making those melts-in-your-mouth Crispy Gluten-Free Chicken Tenders. Trust me, your tastebuds are gonna thank you!
Mastering the Art of Professional Cooking: Your Go-To Guide
So, you want to dive into the world of professional cooking , huh? well, grab a chair and let’s chat.
It's all about those essential preparation steps, the mouth-watering process, expert techniques, and strategies that’ll have you whipping up meals faster than you can say, “what’s for dinner?”
Essential Preparation Steps
First off, let’s talk mise en place . it’s a fancy french term, but it just means getting your ingredients sorted before you start cooking.
Picture this: all your chicken cut into strips, spices measured out, frying oil ready to heat. trust me, it makes a massive difference in your cooking flow!
And while we’re at it, time management is key. you'll want to plan your prep and cooking times, especially if you're tackling something like crispy gluten-free chicken tenders .
If you struggle here, try using a timer. set reminders for marinating and frying, so you’re not pacing like a hungry lion waiting for dinner!
Let’s not forget about safety, either. make sure you know where your fire extinguisher is (seriously!). oil can get dangerously hot.
Maintain a clean workspace to avoid any cross-contamination, especially when working with raw chicken.
Step-by-Step Process
Alright, here’s where the magic happens. Follow these clear, numbered instructions to nail your dish every time:
- Marinate the Chicken: Mix 1/2 a cup of buttermilk with spices. Dunk your chicken strips right in there. Chill for 30 minutes.
- Prep the Breading: Combine 1 cup of gluten-free breadcrumbs, 1/2 cup of cornstarch, and all those yummy spices in another bowl.
- Bread the Chicken: Remove your chicken from the fridge and cover it in the breadcrumb mix. Press firmly to really get that flavor sticking.
- Fry the Chicken: Heat your oil in a skillet over medium-high heat until it's shimmering at around 350° F ( 175° C) . Fry the strips for about 3- 5 minutes per side until they’re golden brown (you’re looking for that crunch factor, people!).
- Drain and Serve: Let those tenders rest on paper towels so they can drain excess oil. Serve hot and enjoy!
Expert Techniques
For perfectly cooked chicken every time , learn about temperature control . your internal chicken temperature should hit 165° f ( 74° c) to ensure it's safe to munch on.
Use a meat thermometer; it’s the best investment you can make!
Now, let’s get real here. most people underestimate seasoning. a pinch of salt can transform your dish! don’t skimp on that chicken tender seasoning .
And for troubleshooting, if your tenders are getting soggy, check if your oil is hot enough or if you’re overcrowding the pan.
A crowded pan is a sad pan!
Success Strategies
So now that you know all the steps and tips, let's talk about common mistakes. one of the biggest? not marinating long enough.
Give those chicken strips at least 30 minutes in that buttermilk bath. trust me on this!
When you’re prepping, think about quality assurance too. take a moment and look at your chicken; does it look good? does it smell fresh? if it seems off, toss it.
Quality ingredients lead to quality food.
And hey, if you’re busy, don’t hesitate to do some meal prep ideas . You can marinate the chicken the night before. Just pull it out when you’re ready to fry!
Final Thoughts
Whether it’s game day or a cozy family dinner, these easy fried chicken tenders are the move. plus, they’re kid-friendly gluten-free recipes that make everyone happy.
Serve them with a good dipping sauce and watch your crew dive in!
Now that we've absorbed all that delicious knowledge, let’s transition smoothly into additional information about serving suggestions, variations, and maybe some killer dipping sauce recipes. Happy cooking!
Additional Recipe Information
When it comes to crispy gluten-free chicken tenders inspired by raising cane's , having a few pro tips up your sleeve can make all the difference.
I've been through the trenches with cooking, and believe me, these little hacks turn sweaty, chaotic kitchen moments into smooth sailing.
Here’s how you can up your chicken tender game.
Pro Tips & Secrets
-
Chef's personal insights: oh my gosh, marinating your chicken in buttermilk really makes the flavors pop! it's like a little love spell for your tenders.
Give it at least 30 minutes, but if you can wait overnight, you'll be amazed at the difference.
-
Time-saving techniques: got family coming over? marinate the chicken and prep the breading in advance. trust me, it saves you so much time later on.
Just grab the chicken from the fridge and fry it up real quick.
-
Flavor enhancement: spice is nice! add a pinch of cayenne or some hot sauce to your buttermilk if you like a bit of heat.
And don’t be shy about cranking up the garlic powder. more is more when it comes to flavor!
-
Presentation advice: it’s all about the looks, folks! once your tenders are all crispy and smelling divine, take a second to arrange them artfully on a platter.
A little sprinkle of parsley goes a long way to elevate the dish.
Perfect Presentation
Now, let’s talk perfect presentation . No need to be all fussy here, but a little effort makes a huge impact!
-
Plating Techniques: Stack your chicken tenders slightly off-center on a plate, leaving room for your dipping sauces. A slight overlap looks casual yet sophisticated.
-
Garnish Ideas: Fresh herbs can turn an everyday meal into a feast. Sprinkle some chopped cilantro or parsley over your tenders for a pop of color.
-
Color Combinations: Complement your chicken with vibrant sides like roasted veggies or a colorful salad. Honestly, it’s all about balance—your plate should be a festival of colors!
Storage & Make-Ahead
Okay, let’s be real: Sometimes life gets busy, and that’s okay. Here are some storage & make-ahead tips to keep your game strong.
-
Storage Guidelines: If you happen to have leftovers (which is rare in my house), store them in an airtight container in the fridge for up to three days.
-
Preservation methods: if you want these tenders to last longer, consider freezing them after frying. just put them on a cookie sheet to freeze individually before moving to a bag.
They keep pretty well for about two months.
-
Reheating Instructions: For crispy goodness, use the oven to reheat—just lay them out on a baking sheet and pop them in at 375° F until heated through, about 10- 15 minutes.
Creative Variations
Spice it up a bit with some creative variations that can keep this recipe exciting.
-
Flavor Adaptations: Think outside the box! Try adding Parmesan cheese to your breading for an extra layer of flavor.
-
Dietary Modifications: Make it dairy-free by swapping buttermilk for a plant-based milk. It works like a charm!
-
Seasonal Twists: In the fall, pumpkin spice in the breading gives a fun twist to your tenders. It’s a perfect little holiday surprise!
Complete Nutrition Guide
Now let’s dive into the complete nutrition guide for those curious about what they’re munching on.
-
Detailed Breakdown: With about 350 calories per serving, it's not too naughty for a delicious dinner.
-
Health Benefits: Chicken breast is a great protein source—perfect for something like a quick dinner.
-
Portion Guidance: Usually, 4 tenders make a solid serving, but if you’re feeling generous (or extra hungry), go for 6!
Expert FAQ Solutions
Wondering how to nail those chicken tender terms ? Here are some answers to common cooking dilemmas.
-
Common Questions: “Can I bake them instead of frying?” Absolutely! Just know they might not have that same crispy crunch.
-
Troubleshooting Guide: If your chicken absorbs too much oil, check the temperature of your oil. It should be about 350° F.
Encouragement to look into In
Remember, cooking is about experimenting and having fun! if you're looking for a gluten-free chicken recipe that delivers crispy, juicy goodness, you really can't go wrong with these crispy chicken tenders .
Whether it’s game day or just a family dinner, these are a great way to enjoy a family-friendly gluten-free meal .
So roll up your sleeves, throw on that apron, and start cooking. your taste buds will thank you!
Crispy Gluten-Free Chicken Tenders Card
⚖️ Ingredients:
- 1 pound (450g) chicken breasts, cut into strips
- 1/2 cup (120ml) buttermilk (or non-dairy milk with 1 tsp vinegar)
- 1 teaspoon paprika
- 1/2 teaspoon garlic powder
- 1/2 teaspoon onion powder
- Salt and pepper to taste
- 1 cup (100g) gluten-free breadcrumbs
- 1/2 cup (60g) cornstarch
- 1 teaspoon paprika
- 1 teaspoon dried oregano
- 1/2 teaspoon garlic powder
- 1/2 teaspoon onion powder
- Salt and pepper to taste
- Oil for frying (e.g., vegetable oil or peanut oil)
🥄 Instructions:
- Step 1: Combine buttermilk, paprika, garlic powder, onion powder, salt, and pepper in a shallow bowl. Add chicken strips, ensuring they are fully submerged. Cover and chill for 30 minutes.
- Step 2: In another bowl, combine gluten-free breadcrumbs, cornstarch, paprika, oregano, garlic powder, onion powder, salt, and pepper.
- Step 3: Remove marinated chicken from the refrigerator. Dredge each strip in the breadcrumb mixture, pressing firmly to adhere.
- Step 4: Heat oil in a skillet over medium-high heat until shimmering (about 350°F/175°C). Fry chicken strips in batches, about 3-5 minutes per side or until golden brown and cooked through (internal temperature should reach 165°F/74°C). Use tongs to flip for even cooking.
- Step 5: Remove the chicken from the skillet and place on paper towels to drain excess oil. Serve immediately.
Previous Recipe: How to Make Paula Deen's Crockpot Mac and Cheese: Ultimate Comfort Food
Next Recipe: 5 Delicious Ways to Enjoy Gluten-Free Miracle Whip Inspired Dishes