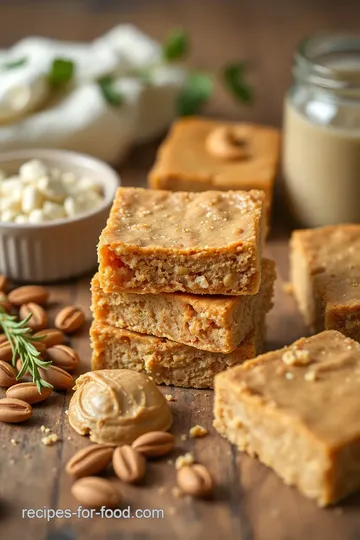
Chewy & Healthy Peanut Butter Bars
Ever wondered how to make chewy and healthy peanut butter bars? These homemade delights are packed with nutrition and flavor, perfect for satisfying cravings! Give it a try!

- Welcome to Your New Favorite Snack: Chewy & Healthy Peanut Butter Bars!
- A Little Background on This Delightful Treat
- What Makes These Bars So Great?
- Easy on the Wallet, Easy as Pie
- Key Perks of These Delicious Bars
- Essential Ingredients Guide
- Getting Started with Professional Cooking Method
- Pro Tips & Secrets to Perfecting Your Chewy & Healthy Peanut Butter Bars
- Perfect Presentation: Make Your Bars Eye-Catching
- Storage & Make-Ahead: Keep It Fresh
- Creative Variations: Make It Your Own
- Complete Nutrition Guide for Your Peanut Butter Bars
- Expert FAQ Solutions
- Recipe Card
Welcome to Your New Favorite Snack: Chewy & Healthy Peanut Butter Bars!
Oh my gosh, have you ever had one of those days where you just crave something sweet but don’t want to indulge in a crazy dessert that’s packed with sugar? i’ve been there, my friend.
Just last week, i was rummaging through my pantry, hoping to find something to satisfy my sweet tooth without the guilt.
That’s when i struck gold: baking peanut butter bars - chewy & healthy! seriously, these bars are like a hug in a snack.
They’re packed with wholesome ingredients and make for a delicious treat that won’t break the bank (or your diet!).
A Little Background on This Delightful Treat
These bars are a twist on the classic peanut butter cookie. think about it: the nostalgia of those cookies but elevated to a chewy, wholesome snack you can enjoy anytime.
Originally, peanut butter treats have been a staple in american kitchens since the early 1900s. who knew that a simple spread of peanut butter could become such a beloved ingredient? today, they’re all the rage, especially for those of us juggling busy lifestyles.
Whether you’re prepping for a hike, need a protein-packed snack, or just want a sweet fix, these bars have got your back.
Plus, they’re a breeze to whip up— just 15 minutes of prep time is all you need.
What Makes These Bars So Great?
Let’s get down to the real juicy stuff: the benefits! first off, these bars are a fantastic source of protein and healthy fats, thanks to our buddy peanut butter.
If you’re looking for healthy desserts or nutritious snack recipes that won’t leave you feeling like you’ve done something wrong, these bars are it.
You can even swap ingredients for healthier versions, making them sugar-free snacks or gluten-free dessert options that the whole family can enjoy!
And can i tell you? they’re perfect for any occasion. hosting a family gathering? check! kid’s lunchboxes? double check! late-night cravings? you betcha.
They’re your go-to for satisfying sweet treats without the guilt.
Easy on the Wallet, Easy as Pie
Let’s talk cost. you probably have most of these ingredients already lurking in your pantry, and the ones you might need to buy won’t cost you an arm and a leg.
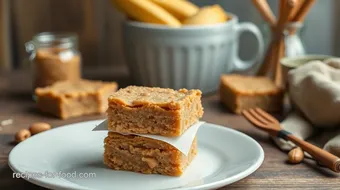
These bars yield about 12 delightful pieces , so it's a great deal for a crowd or just for you , if you can resist eating them all in one sitting (good luck!).
Key Perks of These Delicious Bars
Let’s break down those benefits even further:
- Nutritious Ingredients : Packed with fiber from oats and protein from peanut butter, they pack a nutritional punch. You can feel good about indulging!
- Customizable : Swap in some chocolate chips for those days when you need a little extra lovin’—or dried fruit for a fruity twist. Get creative!
- Quick and Easy : Seriously, I’m talking less than 40 minutes from start to finish. You can make them while you binge-watch the latest Netflix series.
- Perfect for Meal Prep : Make a batch on Sunday, and you’ve got easy snacks all week. Perfect for busy families looking to stay healthy!
This makes them one of those wholesome snacks you’ll want to keep on hand at all times.
So, ready to dig in? let’s gather our ingredients and get to baking these chewy snacks ! you’re going to love how easy and multi-purpose they are.
Plus, they suit everyone—whether you’re vegan or just looking for a delicious, nut butter dessert to get your energy up.
Next, let’s dive into what you need to make these energy bars happen!
Essential Ingredients Guide
Hey there, snack lovers! if you’re ready to dive into the world of healthy desserts , no-bake peanut butter bars , and all those nutritious snack recipes , you’ve come to the right spot.
Let’s break down what you’ll need to design the perfect treat. today, we’re focusing on the star of the show: the chewy & healthy peanut butter bars .
Premium Core Components
First things first, let’s talk about the premium core components that make these bars so special. When whipping up your bars, you'll want to keep these measurements in mind:
- 1 cup (240g) creamy natural peanut butter
- 1/2 cup (120ml) pure maple syrup or honey
- 1/4 cup (50g) packed brown sugar
- 1 large egg
- 1 teaspoon vanilla extract
- 1 cup (120g) rolled oats
You might be wondering, “what qualifies as quality for each ingredient?” look for natural peanut butter without added sugars. it's all about that real flavor! for maple syrup , go for the pure stuff—not the imitation kind.
And those oats? old-fashioned rolled oats give you that chewy texture. if they’re labeled gluten-free, even better!
When it comes to storage, keep these bars in an airtight container at room temperature for up to a week.
But if you want them to last longer, a week in the fridge does wonders. pro tip: let them cool completely before cutting to prevent a crumbly mess when you're serving.
Signature Seasoning Blend
Let’s spice things up! sure, peanut butter is the star, but you can jazz it up with some signature seasoning blends .
You’ll notice i don’t go crazy with spices here, but a pinch of cinnamon or a pinch of sea salt on top can elevate those flavors so much!
Herbs aren’t typically involved in a peanut butter snack, but think of the potential! if you’re up for experimenting, consider fresh herbs in savory variations.
Trust me, a hint of basil with your peanut butter? mind-blowing!
Smart Substitutions
But hey, I know some of you might have dietary restrictions, or maybe you just forgot an ingredient (we’ve all been there!). So, let’s talk smart substitutions .
- Need a vegan option? Swap the egg for a flax egg (1 tablespoon ground flaxseed mixed with 2.5 tablespoons water).
- Out of maple syrup? No worries! Agave nectar or honey works just fine.
- Brown sugar not in your pantry? Coconut sugar has a lower glycemic index and works like a charm.
These simple swaps keep the fun rolling and make sure everybody can enjoy those wholesome snacks .
Kitchen Equipment Essentials
Now, onto the kitchen equipment essentials . You don’t need much, which is a dreamy plus! Here are the must-haves:
- A mixing bowl to combine your ingredients.
- A whisk for that smooth mixture.
- An oven-safe baking dish (about 8x8 inches is perfect).
- Parchment paper for easy serving (because who wants to wash a sticky pan?).
If you don’t have a whisk, grab a fork! It’ll get the job done. Keeping it simple is the way to go.
All About Meal Prep
Finally, let’s talk about meal prep. these healthy snack bars are perfect for that! they can easily fit into your healthy meal prep routine, especially for busy families.
Just whip up a batch over the weekend, and you've got yourself a week’s worth of snacks.
Grab one before school or work, and you’ve got a satisfying sweet treat that’s not just good but good for you .
Plus, your kids will love them as a kid-friendly snack .
Ready to jump into the kitchen? the best part is that you don’t need to be a pro because this recipe is rated easy .
It’s all about enjoying the process, so let’s roll up our sleeves and start baking those delicious chewy & healthy peanut butter bars ! get ready for a treat that’s packed with flavor and nutritious goodness!
Getting Started with Professional Cooking Method
Alright, friends! let’s chat about cooking like the pros do—whether you're whipping up something classic or diving into the world of bake peanut butter bars - chewy & healthy ! trust me, once you master these pro techniques, you'll whip up meals like a champ.
Essential Preparation Steps
Before you even think about turning on the oven, let’s talk mise en place . it's a fancy french term that just means having everything in its place.
That means measuring all your ingredients ahead of time. i can’t tell you how many times i’ve been halfway through and realized i forgot the egg.
So, get that peanut butter ready, measure your oats, and have everything handy!
Next up, let’s chat time management. If you're like me, you're juggling a million things. Set a timer for each step in your peanut butter bar journey! For instance, you’ll be mixing things for a full 5 minutes ; that’s plenty of time to hustle but not so much that you’ll be staring into space!
Organization is key, too! keep your workspace tidy. nobody wants to trip over a bag of oats while trying to gracefully mix up a delicious batter.
And hey, safety tip: always be cautious with your oven. that bad boy gets to 350° f ( 175° c) , and you don’t want your hands anywhere near that hot rack without a mitt!
Step-by-Step Process
Ready for the good stuff? Here’s how to make those bars!
-
Preheat the Oven : First things first, preheat your oven to 350° F ( 175° C) and line your baking dish (8x8 is perfect) with parchment paper.
-
Mix wet ingredients : in a bowl, combine 1 cup of creamy peanut butter, 1/2 cup of maple syrup (or honey if that’s your jam), and a few other goodies.
Whisk it until it’s smooth—aim for about 3 minutes here.
-
Combine Dry Ingredients : In another bowl, mix your dry ingredients, like 1 cup of rolled oats and 1/2 teaspoon of baking soda .
-
Bring Them Together : Fold the dry stuff into your wet mixture. You want it to be well combined but don’t go overboard—you want a chewy texture, not a mushy one.
-
Bake : we’re going to bake these beauties for 20- 25 minutes . look for that golden edge and check with a toothpick for doneness—it should come out clean or with just a few moist crumbs.
-
Cool & Cut : Let them cool in the pan for about 10 minutes before lifting them out. Slice into bars, and voila !
Expert Techniques
You might be thinking, "Isn't this too simple?" Not at all! Even pro chefs emphasize how critical the right steps are.
-
Quality Checkpoints : Always taste as you go! A little spoonful of batter helps you know if you’ve nailed the balance of flavors.
-
Troubleshooting Tips : If your bars seem too crumbly, add a touch more peanut butter or a splash of almond milk. A little extra moisture goes a long way!
Success Strategies
Lastly, let’s avoid some common missteps.
-
Quality Assurance Tips : If they don’t look perfect, don’t fret! These are Guilt-free desserts , and are meant to satisfy your cravings without the drama.
-
Make-ahead options : you can make these peanut butter recipes for the week ahead. store them in an airtight container, and you’ll have nutritious snack recipes on hand to power through the day.
With these simple steps in mind, you’ll have homemade snacks ready that everyone can drool over—think kid-friendly snacks that even adults will love!
Moving from here, you’ll want to dive deeper into every aspect of your cooking journey. we’ll explore more about meal prep ideas and baking tips that can help even the busiest families create wholesome and delicious meals.
Whether it's mixing flavors or crafting that perfect oatmeal bars recipe , there's always more to learn!
Next up: Additional Information...

Pro Tips & Secrets to Perfecting Your Chewy & Healthy Peanut Butter Bars
Let’s dive into some insider tips that’ll make your bake peanut butter bars - chewy & healthy really stand out! first off, don’t be shy about using good quality peanut butter.
No one wants to munch on bars that taste like cardboard. go for the stuff that’s creamy and all-natural—trust me, your taste buds will thank you later!
Time-Saving Techniques
Now, if you’re short on time—who isn’t, right?—you can mix the wet ingredients and dry ingredients in the same bowl.
After whisking everything together, just scrape the bottom to make sure it’s all incorporated. boom! less mess and quicker cleanup!
Flavor Enhancement Tips
Want to jazz things up? add a sprinkle of cinnamon or nutmeg. it'll elevate the flavor game dramatically without adding much time or effort.
And, if you're feeling adventurous, a handful of chocolate chips or nuts could take these bars to a whole new level!
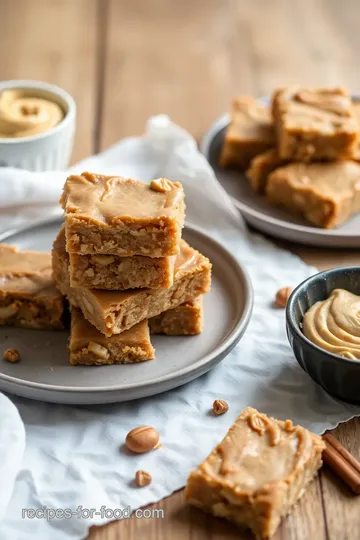
Presentation Advice
When it comes to serving, remember: we eat with our eyes first! after cooling and cutting your bars, stack them up and drizzle some melted dark chocolate on top.
Add a few crushed nuts for crunch, and voila! you’ve got a beautiful, instagram-worthy treat that’s bound to impress.
Perfect Presentation: Make Your Bars Eye-Catching
To make your no-bake peanut butter bars really pop, consider your plating. use a nice plate or even a wooden cutting board to give it that rustic vibe.
A sprinkle of sea salt over top just before serving can add a sophisticated touch.
Garnish Ideas
Fresh berries or a mint leaf can brighten up your plate nicely. if you’re serving at a party, consider putting them on a tiered dessert stand.
Everyone loves a good old fashioned ‘wow’ moment when they see a display!
Color Combinations
Play with color—try to complement the earthy tones of the peanut butter with bright-colored fruits like strawberries or blueberries. You know it’s Pinterest-worthy when it looks like a rainbow on a plate!
Storage & Make-Ahead: Keep It Fresh
These bars can last up to a week at room temperature when stored in an airtight container. if you want to preserve their freshness , just toss them in the fridge.
Trust me, there’s nothing better than knowing you’ve got a stash of nutritious snack recipes ready to go for your busy week.
Preservation Methods
Wrapping each bar in wax paper can also help if you're planning on sharing or taking them on-the-go. Plus, they’ll stay fresher longer—win-win!
Reheating Instructions
If they get a bit hard (which sometimes happens), a quick zap in the microwave for about 10-15 seconds should do the trick. It’s like having a warm hug in your stomach!
Creative Variations: Make It Your Own
Got specific dietary needs or tastes? No problem! These bars are super adaptable. For a vegan peanut butter bars option, just replace the egg with a flax egg.
Flavor Adaptations
Feel free to swap out the peanut butter for almond butter or sunflower seed butter—both are sensational! want some tropical vibes? add in some shredded coconut or dried pineapple chunks for a unique twist.
Seasonal Twists
In the fall, you could toss in some pumpkin puree and spices to really make them stand out. For the summer, just bubble over with berries that are in season!
Complete Nutrition Guide for Your Peanut Butter Bars
Knowing what's in your food can be a game changer. Each bar has about 180 calories packed with protein and healthy fats that’ll keep you full and satisfied.
Health Benefits
These easy baking recipes are not just delicious but also a great source of energy. Perfect for those busy days when you need a boost to keep you going!
Portion Guidance
When cutting the bars, aim for around 12 pieces. Perfectly portioned and easy to share with friends or pack in the kids' lunchboxes as kid-friendly snacks .
Expert FAQ Solutions
I get tons of questions about these bars! Common ones include: “Can I make these gluten-free?” Absolutely! Just use certified gluten-free oats, and you’re golden!
Troubleshooting Guide
If your bars turn out crumbly, you probably didn’t use enough binding ingredients. Next time, consider tossing in some more peanut butter or honey.
Variations Explained
Don’t be afraid to experiment! If you want a twist on texture, consider adding a handful of crisped rice cereal into the mix.
In conclusion, making bake peanut butter bars - chewy & healthy isn’t just about following a recipe; it’s about enjoying the process! you’re creating guilt-free desserts that are perfect for any occasion.
So grab your ingredients, get cooking, and let the taste testing begin. happy baking!
Chewy & Healthy Peanut Butter Bars Card
⚖️ Ingredients:
- 1 cup creamy natural peanut butter (240g)
- 1/2 cup pure maple syrup or honey (120ml)
- 1/4 cup brown sugar (50g, packed)
- 1 large egg
- 1 teaspoon vanilla extract
- 1 cup rolled oats (120g)
- 1/2 teaspoon baking soda
- 1/4 teaspoon salt
- 1/4 cup dark chocolate chips (45g, optional)
- 1/4 cup chopped nuts (40g, optional)
🥄 Instructions:
- Step 1: Preheat your oven to 350°F (175°C) and line the baking dish with parchment paper.
- Step 2: In a mixing bowl, combine peanut butter, maple syrup (or honey), brown sugar, egg, and vanilla extract. Whisk until smooth.
- Step 3: In another bowl, mix rolled oats, baking soda, and salt.
- Step 4: Gradually add the dry mixture to the wet mixture, stirring until fully combined.
- Step 5: Gently fold in chocolate chips and chopped nuts if desired.
- Step 6: Pour the batter into the prepared baking dish, spreading it evenly.
- Step 7: Bake in the preheated oven for 20-25 minutes, or until the edges are lightly golden and a toothpick inserted in the center comes out clean.
- Step 8: Remove from the oven and let it cool in the baking dish for 10 minutes. Lift out using the parchment paper and cut into bars.
Previous Recipe: How to Make Vegan Pumpkin Latte Deliciously Spiced: A Cozy Treat
Next Recipe: How to Make the Best Fried Tofu Nuggets - Crispy, Flavorful Bites